
It’s this cute little brown floral thing I found at the thrift store last Monday. As soon as I saw it, I knew I liked it, even though I didn’t know what to call it. It was a short-sleeved, lightweight blouse-like jacket-like article with satin trim and loops for the buttons. It reminded me of the housecoats my grandma used to wear, but I’m pretty sure it was a contemporary creation because of the modern length and overall excellent condition. It looked like it was approximately my size, it was 50% off, I was in a rush, and I was sure my grandma would be proud, so I grabbed it and purchased it without trying it on.

To start with, we have to give this cute brown thingy a name. Although it might not be entirely accurate, we're going to call it a "dress."
The problem with this dress is that, to get it to conform to the curves of a human body, it was sewn with "gathers." The fabric was made narrower at the waist by bunching it up and sewing it down. While this technique is great for making ruffles, it produces a puckered effect that is unsuitable for the body of a dress. The Unfashionista prefers clean lines, and clean lines she will have!
Step 1: Remove all the gathers from waist and hips.
This step requires one of every Unfashionista's most indispensable tools—the seam ripper! I am going to assume you know how to use a seam ripper, but About.com has a decent tutorial if you need help. This dress essentially consists of a top half and a bottom half. The gathers are placed where the two halves are sewn together--in the lower back to create the waist, and on both sides of the front, to flare the hips. I removed the seams in all three of these areas, leaving the three gaping holes in the dress you see below.
Step 2: Re-sew seams.
Since you only took out a little bit of the seams, it should be pretty easy to put them back together again. The back is a simple matter because there were equal gathers on both the top and bottom halves, so the two pieces of fabric we have to sew back together are the same size. The front gathers, however, were made with less fabric on the top and more on the bottom, meaning we have extra fabric on the bottom and nowhere to put it!My solution is to gather the extra fabric again, but in a more controlled manner, in the form of a dart. Learn more about darts here.
Step 3: Sew darts into hips
Pinch the excess fabric at the edge of the seam. You may want to iron it to keep it obedient, as I have in the picture, but it can be done without ironing too. Sew your dart so that it takes up a lot of fabric at the top, and narrows gradually down the length of the skirt. Some darts end in a point, but that will, of course, create a point, and our clean lines will be ruined, so I sewed a very narrow fold all the way to the bottom hem. This process was followed once on the left side and once on the right side. |
| A dart in the process of being formed. |
Step 4: Measure the Waist
 |
| Pinching the waist to the right size |
Put on the dress inside out. In front of a mirror, pinch the sides of the dress at the level of your waist. Be careful you don't raise your shoulders as you do this, or your new waistline will be too low! Once you are satisfied with the approximate fit, stick a pin where you pinched it to mark the spot.
 |
| Marking with a pin |
Step 5: Adjust the Waist
Looking at the dress, you'll probably find that your pin markings look a little haphazard (more so if you kept sticking your fingers with the pins instead of the fabric!) Don't worry! This is the part where we fix all that. Using the first pin that you placed as a guide, reposition the pins so that they follow a nice clean curve that's close to their original locations. Statisticians, you can think of this as path fitting. This curve is going to be our new side seam.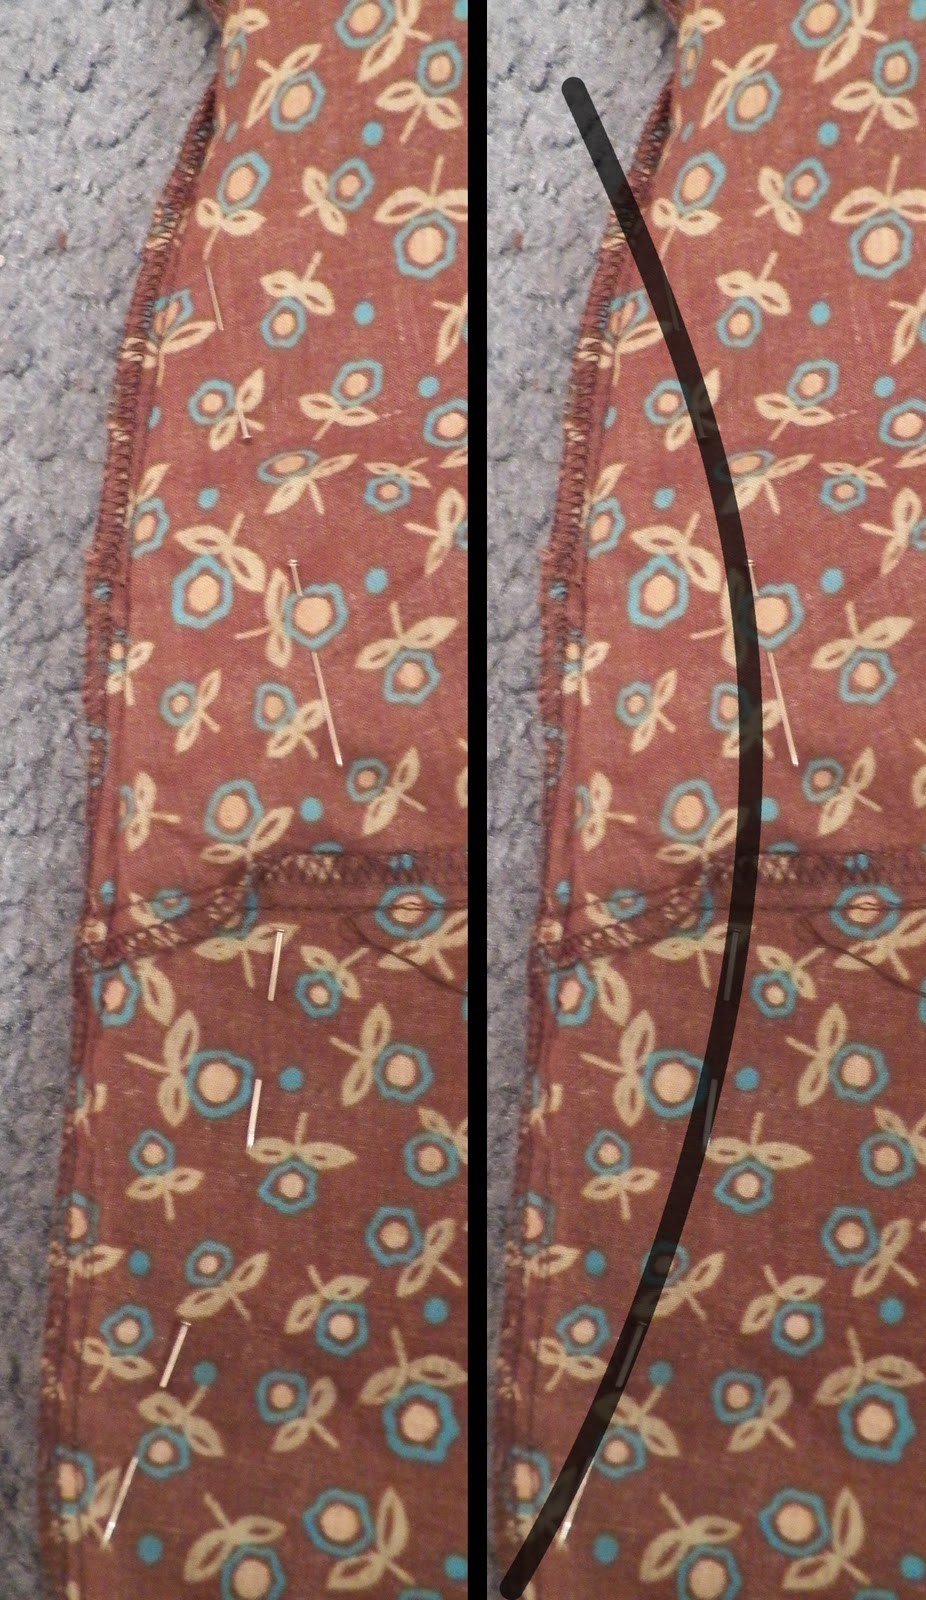 The first image shows the pins after they have been repositioned, and the second shows the imaginary line they are following.
This time I discovered another strange bulge on the right hip that required some minor pin repositioning, but my major issue was with how the dress fit in the back. It's even more lumpy than it was at first!


Step 6: Adjust the Back
Adjusting the fit in the back is pretty much the same as adjusting the side seams. Wearing the dress inside out, pinch the back to the desired width, pin, take off, adjust, try on right-side-out, adjust again as needed.

The second image shows the back seam and the pins reshaping it from a straight line to a curve. They are hard to see, so I've highlighted them in pink!
Step 7: Sew it Up!
Once you are satisfied that your adjustments have created a nice fit, go ahead and sew the seams with your sewing machine. Some tailors get all fancy and mark up their seams with chalk or tailor tacks. Sometimes I do, too, but today I just followed the line of the pins. Note. Do not attempt to sew over a pin with your machine! Sooner or later, you will break your needle. If you sew with the pin heads facing you, it is easy to pull them out right before the needle reaches them.A suggestion for sewing your seams: Since this work of art may still require some adjusting, don't bother securing the ends of your thread (usually this is done by backstitching). Instead, once the sewing is complete and you are certain you won't need to rip out any of the seams and start over, go over the raw edges of the fabric with a zigzag stitch and do your backstitching then. This will not only secure your own stitches, but it will help keep the fabric from fraying.
Hmmmmm...this could totally work with some of my clothes.
ReplyDelete