Tuesday, October 31, 2017

Just another witch costume


Today's outfit is one of those last-minute projects that started out simple and just kind of snowballed into a fairly elaborate costume.

Normally, if Halloween falls on a workday, I wear one of my two Halloween-themed graphic T-shirts and call it a day. I was planning to do nothing more than that this year, when a marketing email from Etsy (yesterday, the day before Halloween) got me to thinking about Halloween hats. For many years, I have been toying with the idea of buying a witch's hat, which I was sure I could deck out in all kinds of embellishments to make a fun centerpiece of a witch costume. So far, the cost (even for post-Halloween sale hats!) has been prohibitive. But the offerings on Etsy, combined with my recent positive experience making a fascinator, reminded me that a hat doesn't need to be full-sized to be effective. The T-shirt I was planning to wear had a fairly witchy theme. Could I make myself a mini witch hat to go with it, in one evening, from things lying around the house?

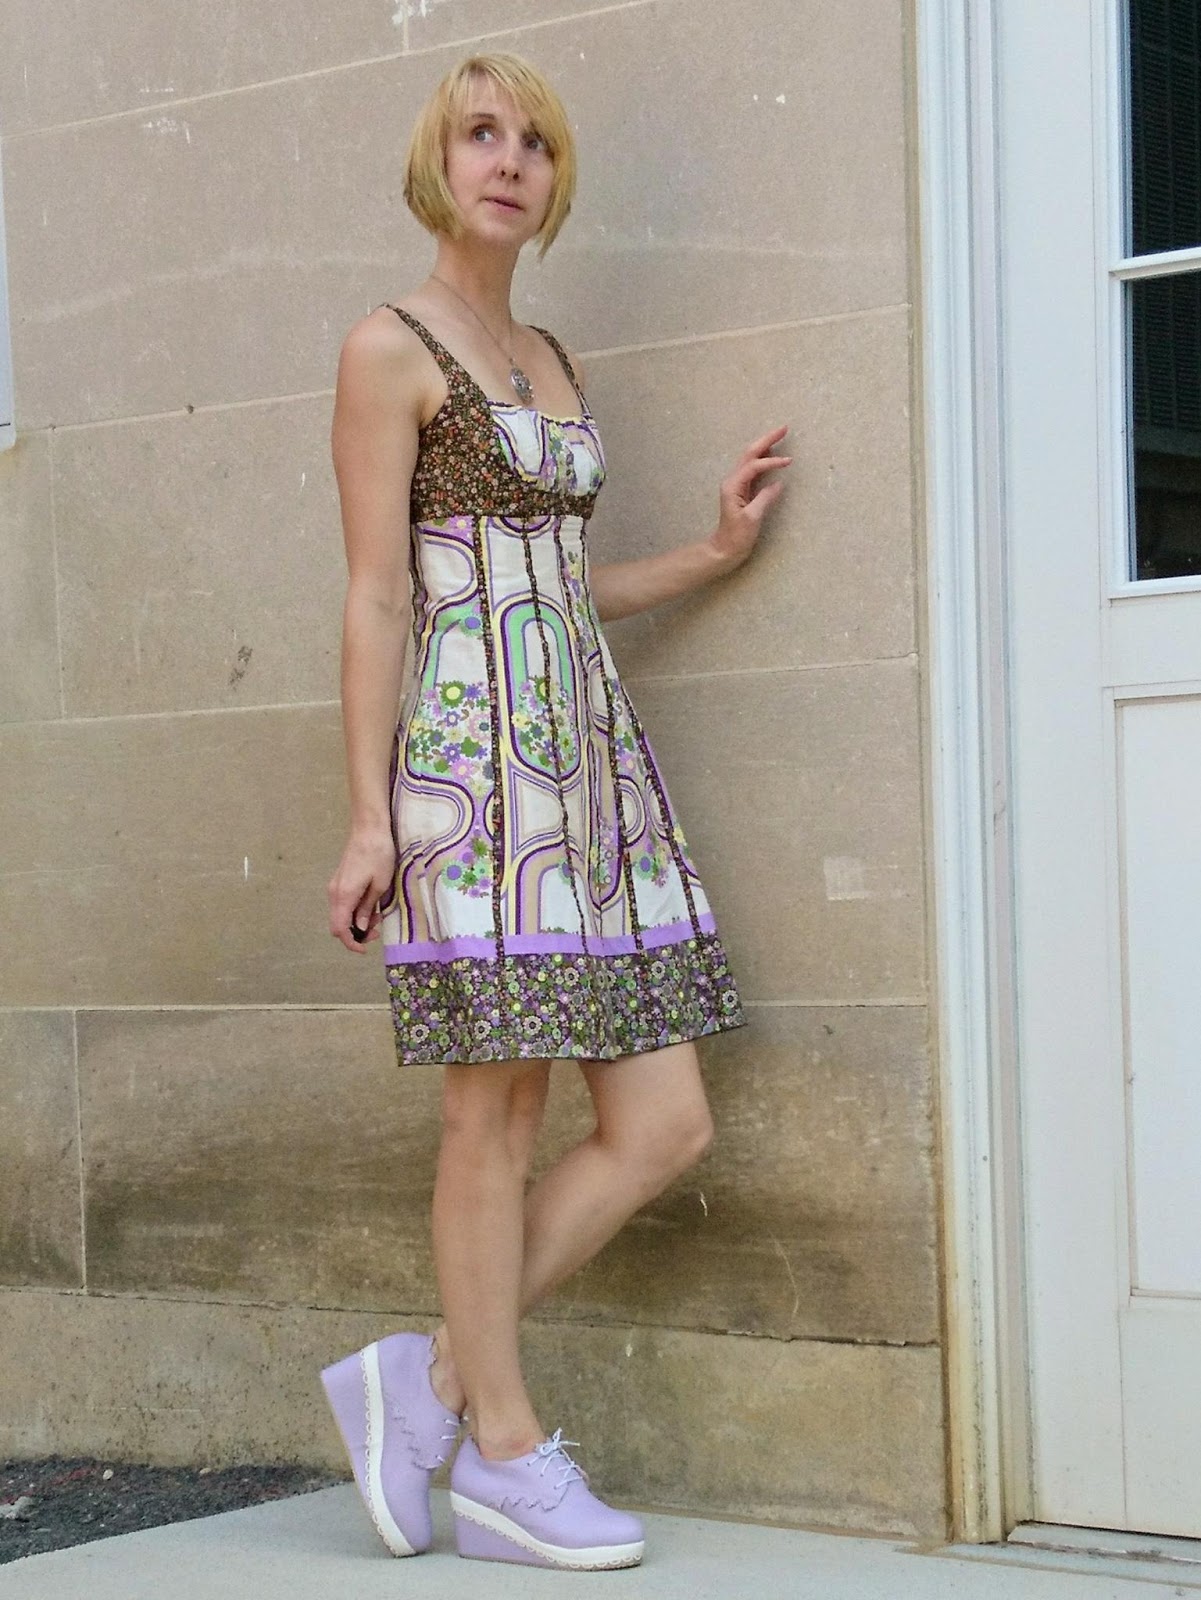
I thought on it for a while. Did I have any cone-shaped objects? Did I have any fabric stiff enough to form into a pointy hat and brim? All of a sudden, I knew what I would use—and it was perfect!  I had recently refashioned a pair of boots into shoes. I had almost thrown away the boot shafts I had removed, but had decided instead to keep them, thinking I might use the faux leather to embellish other shoes. The semi-glossy purple pleather boot shafts would almost certainly be perfect for making into a tiny witch hat!

No sooner had I had that idea, than I received an email from my office manager, announcing that anyone not in costume the next day would be fined five dollars! Well, I like to dress up, but I don't like being forced to dress up, so I was a little miffed...but then I realized that if everyone in the office was dressing up, I wouldn't look too out of place if I wore a real costume instead of just a token graphic tee and a headband. So I could afford to go all-out.

Maybe I'd pair my graphic tee with that raggedy-hem skirt that would look equally appropriate on a pirate or a witch. Maybe I'd wear my black-and-white striped knee socks and – oh! – perhaps the very same shoes that had sourced the material for my future hat! I wasn't quite finished converting them from boots into shoes, but I thought I could get it done in one evening, and they were quite the witchy looking shoe...it's something about giant buckles.

Well, I hadn't followed that train of thought very far, when it led me to another thought: If my outfit had already morphed from a casual ensemble to a proper costume, why bother with the T-shirt at all? Why not go more traditionally witchy from head to toe? It didn't take my thoughts long to alight on my black corset-laced dress. I'd had it for about three years, worn it in public about twice, and was presently trying to sell it. While its dramatically gothic look had never been very versatile in my wardrobe, I'd thought it would sell in no time flat as a Halloween costume...but it hadn't. It was the day before Halloween, and my poor dress hadn't even had an offer or comment. I guessed I'd take it off the market and wear it instead.

So when I got home, I had my work cut out for me: I had to finish my shoes (basically find a way of fastening the buckle), create a mini-hat from scratch, and decide on any additional accessories. As you have probably guessed, I succeeded, but it took me right up until bedtime. In a future post, I'll share exactly how I turned my pair of falling-apart boots into a matched set of shoes and hat, but today, let's just focus on the costume.

The witch dress originally had black satin lacing, which was all well and good, but I figured I could take it up a notch into campy territory by replacing the black ribbon with orange. So I did.

My go-to motif for scary Halloween costumes is spiders. So I dug out my spider earrings (putting them on longer loops so they could be seen below my hair), my furry spider, and my elbow-length spiderweb arm warmers (all of which have been worn on previous Halloweens). I also wore my giant mesh choker, because it vaguely resembles a spiderweb, and chokers are classic Victorian-gothic attire. I also brought a large plush tarantula, to keep on my desk just for kicks.

In spite of our costume mandate, I was still the most dressed-up person at the office on Halloween, but I didn't mind, because my outrageous getup received enough compliments to make it worth the embarrassment of walking around all day in spaghetti straps and a pointy hat.

Monday, October 30, 2017

Things that are pink now


Last year, I was on an ongoing mission to find some basic beige flat shoes. I was no longer content with my Western booties, and wanted something a little more delicate and feminine. Eventually, I succeeded in late spring, but not before I made the mistake of buying these ballet flats at the thrift store.


If you're being generous, you might call the color "champagne." It was not quite tan and not quite silver. It had a faint pinkish hue, which rendered it almost ineffective as a neutral. Beyond that, the color had worn away unevenly around the tiny gemstones, giving each one a dingy halo that made the whole shoe look shabby. 

After a series of unsatisfying wears, I was contemplating getting rid of them, when it occurred to me that I might dye them and turn them into a color that better suited my tastes. So I thought back to what I'd been wearing and what I'd been coveting, and I recalled that, over the last several months, I'd frequently wished I had a pink flat shoe.

Pink it would be!

Now, I didn't want to actually dye this shoe in the traditional way for a number of reasons:
  1. I didn't have any pink dye, and spending 3 dollars on a dye packet would go against my thrifty principles.
  2. I wasn't even sure if dye would work on these shoes.
  3. I could attempt to dye them with semipermanent hair dye, of which I have quite a lot at present, but being semipermanent, I figured it would wash out and/or rub off.
  4. I don't have the right shape of bucket to fully submerge an entire pair of shoes in a dye bath.
So I decided to try a new technique: watercolor painting!

I dipped the shoes in water to get the fabric uppers nice and wet.

Then I mixed some dollar craft paints, pink and white, to achieve a less saturated shade of pink.

I added water to the paint mixture so it would flow easily.

Then I painted the shoes!

It worked remarkably well. The watery paint soaked right into the wet fabric in a fairly even way. Although I can tell there are some darker and lighter areas, the shimmery fabric and presence of gold studs helps disguise that.

While the paint was still wet, I wiped it off the studs and from around the sole with a rag.

This was a very quick and easy transformation!


I have to say I was hoping for less of a bubble gum pink and more of a millennial pink, so I'm not sure if I'll get a lot of use out of these shoes, but at least they are more fun now and won't make me feel depressed every time I look at them!

I wore them for the first time along with a black outfit, a pink necklace, and something else that's newly pink—my hair! Yes! It is finally time for me to try pastel hair color!

I couldn't resist keeping my anemone fish tattoos for a couple more days!
They actually went quite well with the hair!

The first time I bleached my hair back in September, it turned an unnatural yellow which absolutely horrified me.

I immediately tried to cover it up with pastel purple, but (I think because there might have still been bleach remaining in my hair when I tried it) the color did not take at all. I did manage to tone it down with a second bleach job and the use of purple toner, which is why I felt able to go full blonde for a couple weeks. But having had all that time to think, I realized my present still-yellow shade would interact well with pink to possibly produce a cute strawberry blonde. So this weekend, I tried it!

I mixed Manic Panic "pretty flamingo" with a very pastel pink. The pastel shade was too light to color my hair (I'd already tried) and the "pretty flamingo" was too intense and orangey. I hoped that the two together would give me the subtle toning I was looking for. The shade that I got was about right in terms of lightness, but it's still a little more "neon" than I'd prefer. Live and learn, I guess. I have never used Manic Panic before, but I hear it washes out quickly, so I guess I'll be able to try again in a few weeks.

Sunday, October 29, 2017

How to be an anemone


There is something magical about wearing a Halloween costume that people both recognize and appreciate. I think my Halloween costume this year may have been my greatest success to date. Turns out people love Nemo. Not only were most people able to guess what I was, there seemed to be a lot of entertainment value in the word itself:

Anemone.

Apparently everyone knows what it is, but no one can pronounce it!

I got my idea for a sea anemone costume shortly after Halloween last year, when I realized I'd had a clownfish-shaped Air Swimmer lying around in its box for over a year, and that I should use it for something. Imagine being a sea anemone for Halloween, with a real remote-controlled fish swimming around your tentacles!

So for the past year, I'd been contemplating how to create realistic-looking tentacles. At some point, I thought of that springy stuff that people sometimes use in their "raver wigs."  

This is what I meant by raver wigs, if you are not familiar with the concept.
I didn't even know what to call those wigs, let alone what that stuff was that made it up! So the first challenge of this costume was in trying to figure out how to call the material I wanted, so I could actually shop for it. I figured it out eventually, although I can no longer remember how. It's called tubular crin, or sometimes Cyberlox, and I discovered in September that I could obtain 90 yards of it for $12.40 on AliExpress

Learning to use AliExpress was the second challenge of this project, because I had a very hard time getting my account set up, getting back into my account after I got locked out, and getting the website to accept my credit card. Whatever—all in the name of discounted bulk purchasing! I ordered three colors—two shades of green and one neon pink, and waited. My tubular crin was on its way from China, and all I had to do was hope it arrived in time to actually make it into a costume.

While I was waiting, I happened across a pair of neon yellow-green pants on Swap.com [referral link, ho!], and then a yellow tank top that looked amazingly similar to the pants. This decided me. I would be a green anemone, not a pink one, and I would wear these two items as my base.

The tubular crin arrived about two weeks before my big Halloween party. It was everything I could have imagined...except for one small issue. As it had been folded up and crammed into a box for several weeks, it was kinked and crimped in some spots, which caused it to bend at strange, un-tentacular ways. I looked online for techniques to un-crimp your tubular crin, but couldn't find any. So, Internet, allow me to teach you one!


How to straighten bent tubular crin

You will need the following:
  • Tubular crin, in any sad kinky condition
  • A hair dryer
  • A straight rod narrow enough to fit inside your tubular crin. I used a 3/8-inch dowel rod.
Take your sad, kinky tubular crin.


Insert the straight rod inside it to straighten the bent parts.

I tried just holding the tubular crin straight during this process, but I found that stretched it out too much (which makes it narrower), and caused it to flop around unhelpfully during the straightening process. So yes, use a rod. It is essential!

Using your hair dryer on high heat, slowly run the dryer up and down the length of the rod.

Remove the straightening rod. The bends in the crin should be much less pronounced, if not completely gone!

One thing the Internet was able to help me with was how to keep the ends of tubular crin from fraying. Essentially, you fold the raw ends inside. It took me a few tries to figure out an effective technique for this, but eventually I got it.

The next question was how to attach the tubular crin to myself, in order to make it convincingly reminiscent of an anemone's tentacles. I figured I would attach it to the shirt in some way.

I wanted each tentacle to kind of point upwards and then arch back down. In order to give it a certain amount of rigidity at its base (so it would stand up) as well as effectively halve the number of pieces I'd have to attach, I decided to fold each length of tubular crin in half so both open ends were facing the same direction.

Hot glue turned out to be my best friend for this project. For each tentacle, I simply folded it in half, pinched the two halves together as close to the fold as I could, and put a drop of hot glue over the join. It took a few seconds to dry, but eventually I made some U-shaped pieces of wire that neatly held the crin in place so I could put it down and work on the next one before the glue was hardened.

Originally I planned on sewing the tentacles to the shirt, so I could remove them after Halloween and still have an undamaged shirt to wear. Alas, after a few attempts at hand-stitching the floppy, uncooperative crin to an equally floppy shirt, I gave up and just used hot glue for this process as well.

Here's how it looked after I had attached one row of tentacles all the way around the shirt.

I thought I was done at this point, but then after looking at a few more photos of sea anemones, I decided I needed more tentacles! Good thing I had gotten 90 fricking yards of the stuff! I made some 14 more tentacles in record time, and attached them under or above the existing tentacles, wherever they fit best.

Woohoo! Body of the costume was basically done, but now there were new challenges.

In all the years that I'd owned it, I had never taken my flying clownfish out of its box. But 6 days before the party, I finally got around to it...and discovered to my intense dismay that it was  far too big! I had envisioned a fish maybe the length of my arm, but what I got was basically the length of my entire body! A clownfish that big could not take refuge in an anemone my size. My costume idea no longer made any sense! Furthermore, I didn't even know if the fish would fit anywhere! It would practically take up a whole room at the party! The flying fish was a no-go!

And so, a last-minute clownfish search ensued! Yes, I was trying to find Nemo.

I went to all the discount and dollar stores at my local mall, but came up empty. Then, reluctantly, I borrowed my boyfriend's Amazon Prime account and found a couple of stuffed clownfish toys that I thought would do a decent job. I take pride in making cheap Halloween costumes out of basically what I have lying around, so I was disappointed that I'd need to incur this extra expense, but we have to do what we have to do. An anemone without fish is like a summer without sunshine!

My clownfish came on Tuesday as expected...to the wrong address! I admit to having a meltdown at this point. All I was trying to do was make the coolest Halloween costume ever, and nothing was working out! Fortunately, this issue only took a day to rectify. My boyfriend's mom hand-delivered my box of fish the next day, leaving me plenty of time to find a way to work them into my costume.

They came with plastic hangers, so I hung one from the underside of my tentacles, and made a bracelet out of ribbon so I could carry the other one on my wrist and make it "swim."

As a finishing touch, something which had occurred to me the prior week, I had ordered some temporary tattoos with a clownfish motif. They were only a few cents each, but I had to pay three dollars for shipping. I cut them out (laboriously) and positioned them meticulously upon my cheeks.


With all these clownfish covering me, there should  be no question what my costume represented, so the rest was just details. I wore brown flat shoes (to resemble sand), wore a wavy blue headband, and put a lot of blue-green makeup on my eyes (to resemble water).

And lastly, since these things are important to me, some costs.
Tubular Crin:  12.40 (though I could probably get some of that back if I sell the leftovers)
Temporary Tattoos:  3.69
Pants: 2.40
Shirt: 2.70
Two clownfish: 9.68
Total: 30.87
In conclusion, while this is possibly my most successful Halloween costume to date, it is probably my most expensive one as well. It did, however, garner third prize in the costume contest, so I guess you lose some, you win some.

"Sea" you next year!

Monday, October 23, 2017

A crash course in fabricating fascinators


So, the last time we spoke, I was telling you all about the event which I attended dressed as Mrs. Peacock, the character from the game of Clue.

The day of the party, I got home at 5:00, two and a half hours before we were supposed to leave for the event. I scurried into the basement to gather supplies from my stash of floral-decorating miscellany. I've always had a penchant for artificial birds; when I was young, I used to buy one or two every time I visited Bronner's Christmas Wonderland, and I now have quite a collection that I just can't bear to get rid of because you never know when a fake bird is going to come in handy...like now! I found two matching blue birds which reminded me of peacocks...with a little imagination. I took one of them for the project.


I also happened to find in the box this magnificent bundle of glitter-coated beads on a wire, which had been part of a Christmas decoration I bought a couple years ago at Joann Fabrics, at a very heavy post-holiday discount. I tired of the decoration after a while, but no one wanted it even when I Freecycled it! I felt like it could do better things than line the bottom of a landfill, so I found a home for it deep in my florals box and let it sit, waiting for its moment to sparkle...like now! It was just the kind of thing to put on a fascinator—flashy and bouncy, and blue-green, which was perfect for my color scheme!

The last missing piece for my fascinator was a handful of feathers. Just the weekend before, I'd been tidying my jewelry-making cache, and I'd finally decided it was time to get rid of the feather earrings I'd already retired a year or so ago. On Sunday, I'd taken them apart, kept the hooks and chains, and tossed the now dingy and ratty feathers in the trash. Now, 6 days later, I was feeling really lucky that we hadn't taken the garbage out on Tuesday, because I was able to rescue the feathers from the bin and use them for my costume!

I washed them first, but even after a bath in dish soap, they still looked dirty. Besides, white feathers would not do for my green and blue costume! Fortunately, I still had some of the green dye I used on my hair last summer. Dumping the feathers on a plate, I coated them liberally in dye and then left them to sit while I worked on some other parts of the project.


Now that I had a good collection of doodads to put on my fascinator, it was time to figure out a way to put them all together. That was the tricky part. I've never made a fascinator before.

I have a couple of ornate headbands with big head-covering parts that have felt pads as a base. Unfortunately, I don't have any felt lying around. I googled "base for fascinator," and found a bunch of pictures of mesh-looking things in various small shapes. Mesh... mesh...how about a window screen!? I have quite a stash of window screens, because I can't resist picking them up when I find them in someone's trash. At one point, I'd had some metal screen that I thought would be perfect for this purpose...but I couldn't find it.

I did find this terribly shabby, torn-up piece of window screen that clearly wasn't good enough to keep bugs out of a window...which meant it would be great for experimentation!

I folded it in half so I had two layers, and then laid it on top of a plastic bag and painted it green. I figured the green paint would give it a more appealing color, as well as stiffen it up so it could support the weight of the things I was going to attach to it.


To give it a rounded shape so it would fit more naturally on a human head, I spread it over the bottom of a mixing bowl while it dried.

And to speed up the drying process, since by now I only had 1.5 hours until it was time to leave, I placed it directly beneath a heat lamp.

While it was drying, I took time to shower and do my hair and makeup. After that, I checked the drying base and found it so dry, I decided to add another coat of paint. Then I dried my hair.

When I was done gussying up myself, it was time to get back to work on my accessories. The feathers had been sitting in the dye for at least 25 minutes, the minimum recommended time, so I took them out, rinsed them, and patted them dry. They took a nice emerald color.

I removed the now-dry fascinator base from the heat. Miraculously, my paint job had done just as expected and turned the floppy screening into a semi-rigid curved sheet. I cut it into a smaller circle, and got out that which would become the base for my base: a metal headband.

This was the point at which I stopped taking pictures, as I was getting – literally – right down to the wire.

I poked the bird leg wires through the base (Craft birds usually have wire on the ends of their legs so they can be attached to various decorative objects), then I wrapped them around the headband to keep them stable.

The blue-green bobbles were also, conveniently, positioned on very thin wires, so when I removed them from their original base, they were easy to poke through the fascinator base at a few points in a circle around the bird.

At first, each of the three wires formed a high loop way above the bird, so I poked them down at the center of their arch to double the number of loops and make them shorter and more perky. I sewed the looped parts to the base.

So far so good; the last step would be the feathers. I wasn't sure exactly where I wanted the feathers to go, but as soon as I experimentally positioned one on the base, I saw it: I would fan them out behind the bird just like a peacock's tail. A drop of hot glue for each feather was all it took!

To finish the fascinator, I made sure all the wires underneath the base were looped around the headband with their prickly ends on top, so they wouldn't stab me in the head all night. I affixed those in place with more hot glue.

Here's how it looked when finished (actually, I can see the wires still sticking down, so these photos were taken shortly before it was finished)!


My fascinator was not high enough quality to keep for a second use (and by the next morning, the feathers looked like they'd had enough of this world), but the whole thing held together almost all night. The threads holding one of the glittery loops broke, so that part kept popping up, but other than that, I was golden.

So in conclusion, you don't have to be a milliner to make a decent fascinator. Just have a large hoard of random glittery fluttery things, a hot glue gun, some old window screen, some paint, and two hours!

Sunday, October 22, 2017

Last-Minute Mrs. Peacock

 
One of the best things about Halloween season is it usually provides plenty of opportunities for an Unfashionista to dress in costume. I have been planning various Halloween costumes since mid-September (and ideating them for years!) but a group costume as characters from Clue never crossed my mind...until around 10am on Friday. I was one of three people going to a murder-themed event that evening, and with only 10 hours until the doors opened, I suddenly realized that we could all dress as characters from the game!

My friend took Miss Scarlet, I assigned my boyfriend Mrs. White (since he already has a French maid costume), and I took Mrs. Peacock. (See what they wore in our Photobooth pics!)

I did a little research so I could make my costume as authentic as possible, and found that there are many variations of the game Clue as well as a couple of movie adaptations, and several less-than-consistent descriptions of the characters.

But here is what I was able to glean about Mrs. Peacock from various sources. She is a wealthy widow; some sources say she has had many husbands who all met their untimely demise. In one of the descriptions I read, her character raises birds. Her appearance evolved over several versions of the game, back and forth between elderly and stuffy and young(er) and stylish, but she almost always dresses in blue and wears a hat (naturally I went with the young and stylish variation!).

This is the picture that I used
as inspiration for my costume
I was thrilled with what I learned about my character, because I have a wealth of blues and greens in my wardrobe, never miss an opportunity to dress like I'm rich, and also happen to really appreciate birds. Since Mrs. Peacock usually seems to be wearing some sort of ostentatious hat in almost all of her forms, I decided this would be the perfect opportunity to make myself a fascinator! In case you weren't up on wealthy-woman headwear, a fascinator is basically a hat, but instead of covering the whole head, it only covers part of it, and it usually has lots of frills and feathers and things sticking out of it. Fascinators are commonly seen on the Royal Family and at horse races.

How I was going to make a fascinator, I really didn't know...but I guessed I was going to find out! As it turned out, I did find out, and it actually worked out well. But the process was so long and involved, that I think it is worthy of another post all its own. So let's leave the talk of fascinators for a while, and get back to the rest of the details of the outfit.

Obviously, you can't be Mrs. Peacock without wearing blue. As it so happens, I have a blue satin dress that I've been saving (in an admirable display of patience, if I do say so myself) since I last wore it in 2014 (I wanted to give it one more chance and wear it with a particular pair of shoes...but now that it's had its second wear, it's off to eBay for this dress!).

Since we were traveling on Metro and likely to be walking around in a museum all evening (and who knows where the night might take us afterwards), I decided to wear flat shoes even though they hindered the glam quotient slightly. As long as they were blue, that's what really mattered!

The finishing touch was a pair of peacock feather earrings and some blue and green eye makeup.


But the real star of this outfit was definitely the fascinator. Stay tuned for the full story on how I learned to make a fascinator in under 2 hours!

Tuesday, October 17, 2017

Masquerade


New Year, 2014, when I donned my first
(self-decorated, naturally!) masquerade mask.
The Unfashionista loves a good masquerade ball. 

I've only been to one, but liked the idea so much that I started accumulating a collection of masks, "just in case."

The opportunity to bring one into the spotlight finally occurred last weekend, at a friend's recreation of Truman Capote's (I would say "famous," but I'd never heard of it until I got my invitation) Black and White Ball. We were required to wear black and white, and encouraged to bring a mask if the spirit moved us. Of course, I needed no further encouragement, so I set about decorating the fanciest of my masquerade masks, which conveniently at this point was nothing more than a white base.

I had an ostrich feather I'd been hoarding (incidentally, I'm pretty sure I acquired it at the same New Year's party as in the picture), so I hot-glued it to the mask, also wrapping it with fishing line for good measure. The mask had ties to attach it to one's head, but I didn't like what that did to my hairstyle, so I removed those and replaced them with a stick, which is a much more classy way to wear a masquerade mask anyway.

When all was said and done, my mask was one of only two at the party, and no one was actually wearing the other one, so mine stayed in my purse for the duration of the fête. But here's a picture of me peacocking around in it at home after the event was over.


Alas, my handiwork doomed ever to languish in the darkest reaches of the internet, known only to the elite readers of fashion's best-kept secret—my blog!

Unlike my very secret mask, the outfit I wore got a lot more positive attention. At least 3 people commented that they loved my dress, and at least one of them took enough interest to learn that it wasn't actually a dress, but an amalgamation of three different garments: my FabKids tutu, an old camisole that I cropped and hemmed specifically for this occasion, and a new sheer top with stars that I recently acquired from China/eBay.

Weird neckline, cool design.
Getting the top was quite an ordeal—I ordered one last year, but it got turned back at customs, and the seller declined to send me a replacement (they refunded me). Later on, I decided I wasn't ready to roll over and quit just yet, so I ordered another one in August. This time it arrived, and I have to say it wasn't a bad deal for $1.99. The original neckline was hideous, but I was able to fix that with a few snips of my scissors.

Since it was a black-and-white party, and so far I was wearing only black, I simply had to don my white knee-high boots. Had I been wearing the mask, I would have had a nice sandwich of black and white color (like an inverted Oreo), but I had to settle for some much less noticeable white dangle earrings.

Monday, October 16, 2017

Polka dots and pearls


My no-longer tiered dress, with its spaghetti straps, is not quite appropriate for the office when worn on its own. On the other hand, it's perfect for layering, and layering is perfect for fall.

Today I wore it with a white cardigan on top and white boots on the bottom (an easy way to color coordinate if I ever said so). I was only slightly disappointed to find out that the matching whites I'd picked out in the misty morning turned out not to match quite so well in natural lighting. Even after 5 years of ownership, this sweater is still the whitest of whites, but the boots are yellowing, and showing their age in all sorts of other ways—I fear they are not long for this world!

But one thing in my outfit that's brand spanking new is the earrings! I saw earrings like this on eBay a few months ago. I naturally liked the long dangling chain, and I thought it was cool the way the chain hung from the back of the ear instead of the front. I'm sure they were under 3 dollars, but I decided I would make my own for free! I recently disassembled a long faux-pearl necklace, leaving me with dozens of loose pearls to work with. So I took one of those and a few scraps of salvaged silver chain, attaching them together with a loop-bottom silver pin through the pearl. I used an existing pearl stud for the front, and a jump ring to put the stud pin through. 
 
 
When held together with a standard earring back, the whole assembly is a subtly unconventional way to wear pearls!
 

Thursday, October 12, 2017

Floral choker


Frequently I find that when I plan an outfit, I wore almost the exact same thing on almost the exact same date in the past.

Today, I'm about 2 weeks and 3 years behind, but I used this dress and color scheme on September 27, 2014. I even, unknowingly as I was planning the outfit, contemplated wearing the same pair of shoes, but ultimately decided I'd rather wear something newer and lower-heeled, so I went with the olive shoes that I've decided were a very good investment indeed!

This is my second pair of short block heels, (the first being the silver glitter ones), which I'm totally digging since I first noticed them around the end of last year. Another trend from 2016's end-of-the-year post that made it into today's outfit was the choker necklace. I have to say that 2017 has been the year of the choker for me, and I have to say, it was an unexpected development!

If you'd asked me 5 years ago if I would ever be in love with chokers, I would have told you, "No way!" Back then, I liked chokers in theory but felt they were unflattering—especially on me. I felt like they abbreviated my neckline, making me look short and stumpy, and emphasizing the fatness of my cheeks. Maybe my cheeks got thinner, maybe I just got used to the look, or maybe it's my shorter haircut that just works better with a high neckline, but I no longer have a problem wearing chokers. It doesn't hurt that chokers went from being a fringe accessory to a fashionable one. While the trendsetters have moved on to bigger and better things, I still haven't finished exploring the possibilities of fabric chokers. I simply can't resist donning one whenever I can conceivably work one into my outfit, and I keep looking for more exciting choker styles to add to my collection.

Today's choker is the most exciting one yet. No longer just a simple ribbon or velvet band or even a velvet band embellished with a pearl, even more ornate than a mesh collar, today's floral embroidered choker is pretty much the pinnacle of chokerdom.
 
 
It's so tall and bright, it is impossible to miss. Its colors are such that it looks like it could be a part of my cardigan. Its pattern is unlike that of any other choker I've ever seen. It is, unquestionably, the focal point of my outfit.

I paid $1.51 for it on eBay, and I have reason to believe that it is actually an embroidery patch for clothing that some ingenious seller decided to attach to some jewelry chains (it actually had a thick sheet of plastic stuck to the back that I'm pretty sure was an iron-on transfer, which I had to peel off before I could wear it). Hats off to you, ingenious seller! I only wish I had come up with that idea myself. 

However, now that I have worn the pinnacle of chokerdom, I don't really have anything left to aspire to. This might be the last time in a while that I get excited enough about a choker to write a whole blog post about it. I guess it's time to move on to bigger and better things. Hmmm, what are the trendsetters into these days?

Wednesday, October 11, 2017

Looks like fall


I'm sharing this outfit mainly because I want to discuss the intricacies of dressing for fall, so let's get the outfit description out of the way quickly. It was warm yesterday, so I went with sandals, a very airy cap-sleeve sweater, and a skirt. As far as the construction, it's all summer clothes, but the color choices are another story. With a brick red shirt, a skirt in various dark and rusty hues, and a orange shoes, I'm the very picture of autumn. It was probably one of the last really warm days we'll have this year (yes, I'm still saying that!) so I wanted to dress for the weather but give a nod to fall.

Speaking of fall (hello, artful segue into what I truly wanted to talk about!), I'm really struggling with how and when to make my seasonal switch this autumn.

Though we've had plenty of cold days since the end of August, there has not been a single full week of temperatures below 75 (my usual cutoff point). We came very close, with a 6-day stretch in each of September and October, but then, both times, it bounced right back up into the 80's. I'm getting so bored with my selection of summer clothing, and so tired of trying to figure out new ways to layer long-sleeved tops over my summer dresses, and basically so desperate to make a change... but I just can't bear to put away my summer clothes when summery days are still popping up at least once a week!

To understand why I feel so strongly about holding onto my summer wardrobe at all costs (even though I'm tired of everything in it), you must understand that I really just loathe dressing for cold. 

I'm an (un)fashionista—I put great effort into looking good at all times, and I just don't feel like winter clothes are very flattering. The warmer the fabric, the thicker the fabric...and the thicker the fabric, the bulkier it makes you look. That, compounded with the fact that you're usually covering more of your body, is a recipe for turning the most lithe and graceful form into a hulking blob. And don't even get me started on my massive shoulders—the way things drape off them, it swamps the rest of my body, which means that basically any garment with sleeves is going to add about 3 sizes to my frame. 

But my distaste for winter clothing goes beyond just vanity—it's also a simple matter of quality of life!

I hate wearing clothes with sleeves because they restrict how I can move—I feel confined in them, like I'm a prisoner in my own clothing. If I wear fitted blouses or blazers, I can neither raise my arms fully nor pull them all the way forward. And sleeves are always getting in the way, doing things like dangling into my food while I'm eating and getting soaked when I wash my hands. 

Furthermore, in cool weather, I can never find a level of coverage I'm comfortable with. Although I get cold very easily, I also get sweaty very easily. No matter what I wear, if it's warm enough to keep me warm when I'm sitting still, it's going to be too hot when I'm moving. So in the winter, I'm fighting a constant battle not to sweat all over my sweater and turn into a odorous ogre by lunchtime.

In conclusion, cold-weather clothing stinks. Side note: when people say they're looking forward to fall because they want to wear "cozy sweaters," I sincerely want to slap them. If I never had to wear a cozy sweater again in my life, that would be my idea of a perfect world. But alas, the world isn't perfect, cold-weather clothing is a necessary evil, and it's one which I'm going to have to begin wearing in fairly short order.

So when am I going to do it? I don't have to put away my summer clothes before I start getting out my fall ones. I can do a partial switch as I did last spring, saving the new ones until the official week-of-75-degrees cutoff has arrived, but bringing out only last year's transitional clothes earlier. But I need to set a time when it's OK to do the partial switch.

Right now we've had 14 total days with highs under 75 degrees. Should two cumulative weeks be cause to bring out the fall clothes? Should three?

Should I wait until I've worn all of the transitional clothes in my backup stash? The problem with that is I've worn none of them, but they are so boring that I don't want to! The other problem with that, and another factor that I need to rethink as I plan my seasonal wardrobe, is that they are mostly clothing that's entirely unsuited to transitional weather. They are mostly 3/4 sleeve tops. Seems like a good compromise between hot weather (short or no sleeves) and cold weather (full sleeves), right? Not at all! When the weather outside isn't quite frightful, that's when the weather in our basement office is the chilliest—because, as I've mentioned before, it's still warm enough in the upper stories of our building that maintenance will not turn on the heat. In the winter, when I can crank the temperature up to my heart's content, I could easily be comfortable in short sleeves. But in the fall, when I'm at the mercy of the people on the fourth floor, I have to wear long sleeves and gloves! (I blame that on my desk, which seems to just suck the heat right out of any skin touching it). So really, my 3/4 sleeve tops are the worst possible choice for this time of year—too skimpy on their own, but too bulky to layer over.

Right now I'm thinking that I'll go ahead with the full switch as soon as there are no more days predicted to be warmer than 80 degrees. That might be as soon as this Sunday. Until then, I'm sure I can get by, if needed, on knit caftan tops, arm warmers, and lots of layering. And if I decide to change my mind and define another threshold, well, it won't be the first time, and it probably won't be the last.

Friday, October 6, 2017

Flower / Child


Let me start off by saying how much I love this dress! Look at its quintessential hippie print, and its Unfashionista-approved array of colors! The mix of earth tones and pastels is weird, but it works, and it provides a versatile backdrop for accessorizing in almost any hue!

This dress was a hand-me-down, and its life with me got off to a rocky start when I discovered the straps gaped in a most bizarre fashion right over my chest. Although I'd never dealt with a problem like this before, it was actually easy to fix with just a simple horizontal dart.
Left: Weirdly gaping shoulder strap at 3:00. Right, no gape! (reversed because the first picture was taken in a mirror)
From thence, it was on to endless flower-power fun!

I wore this dress once in the summer, pairing it with a perfectly coordinated set of light green sandals. I didn't think I'd have a chance to wear it again, but the weather has been merciful and graced us with another October day in the 80's! Even though the highs are delightful, it's still chilly in the mornings (and in our basement office), so I topped the outfit with a brown sweater.

In a reflection of the colorful patterns on the dress, I wore a silver medallion with pastel gemstones.

The most exciting part of the outfit is, as is often the case, the shoes. Today I'm wearing some lavender and white platform oxfords that I got last spring, thinking pastel purple would be a great addition to my shoe collection. As is often the case, it wasn't. Nothing seemed to go with them! When spring waned and summer arrived, I decided to shelve them until fall, so that I'd have something new and cheery to wear when the weather turned depressing. Well, the weather is not depressing, but fall is here, and I'm struggling to find stuff to wear with my summer clothes, so why not these? This dress is one of the only things I've found in my wardrobe that doesn't outright clash with the shoes.

However, I found that even though the colors work together, the styles don't. The shoes have a childlike, prissy vibe, while the dress is a little more bold and daring. The whole day, I felt like I was one person on top, and a different person from the knees down. I also didn't like the way my ankles looked sticking out of the shoes...but I also didn't like the way they looked with anklet socks! I just can't seem to win with these shoes!

While the dress and shoe combo may have been less than stellar, I've said it before and I'll say it again: I love this dress!