
From a useless pair of leggings to a scarf, some boot toppers, and a headband, this 3-way refashion was a great way to get into the DIY groove after a long absence!

The feedstock was a pair of metallic printed leggings that I got from Swap.com.
Even though they were nonreturnable, and even though they cost $3.20 (more than I normally pay for a nonreturnable item), I took a chance on them because I figured leggings are stretchy, so they'd almost certainly fit! I was wrong. These leggings were so tight, I knew I'd never be able to sit comfortably in them.
As with most of my failed purchases, I chucked these into a donation box...and couldn't stop thinking about them! Such shimmer! What a pattern! I couldn't just let them disappear from my life like that!
These days, when faced with a fabric item that looks gorgeous but isn't quite usable as-is, my first thought is, "Can I turn it into a face mask?" In the case of these leggings, while there was more than enough material for several masks, the non-printed parts were too sheer to provide adequate filtration, and the printed areas weren't breathable at all!
Another option was just to use it as a loose-fitting mask cover, purely for decoration. I've been experimenting with scarf-style masks, and I thought the long legs of the leggings would serve that purpose admirably!
So into the fitting room (that's also my office, closet, and crafting room,) I went! The goal was to find a shape that would hang off my nose without immediately falling down from the weight of so much fabric.


I swear I took more pictures of this process, but they don't seem to be anywhere in my camera. I think either the camera or the XD card is beginning to die, because this isn't the first time I've lost photos in a mysterious way.


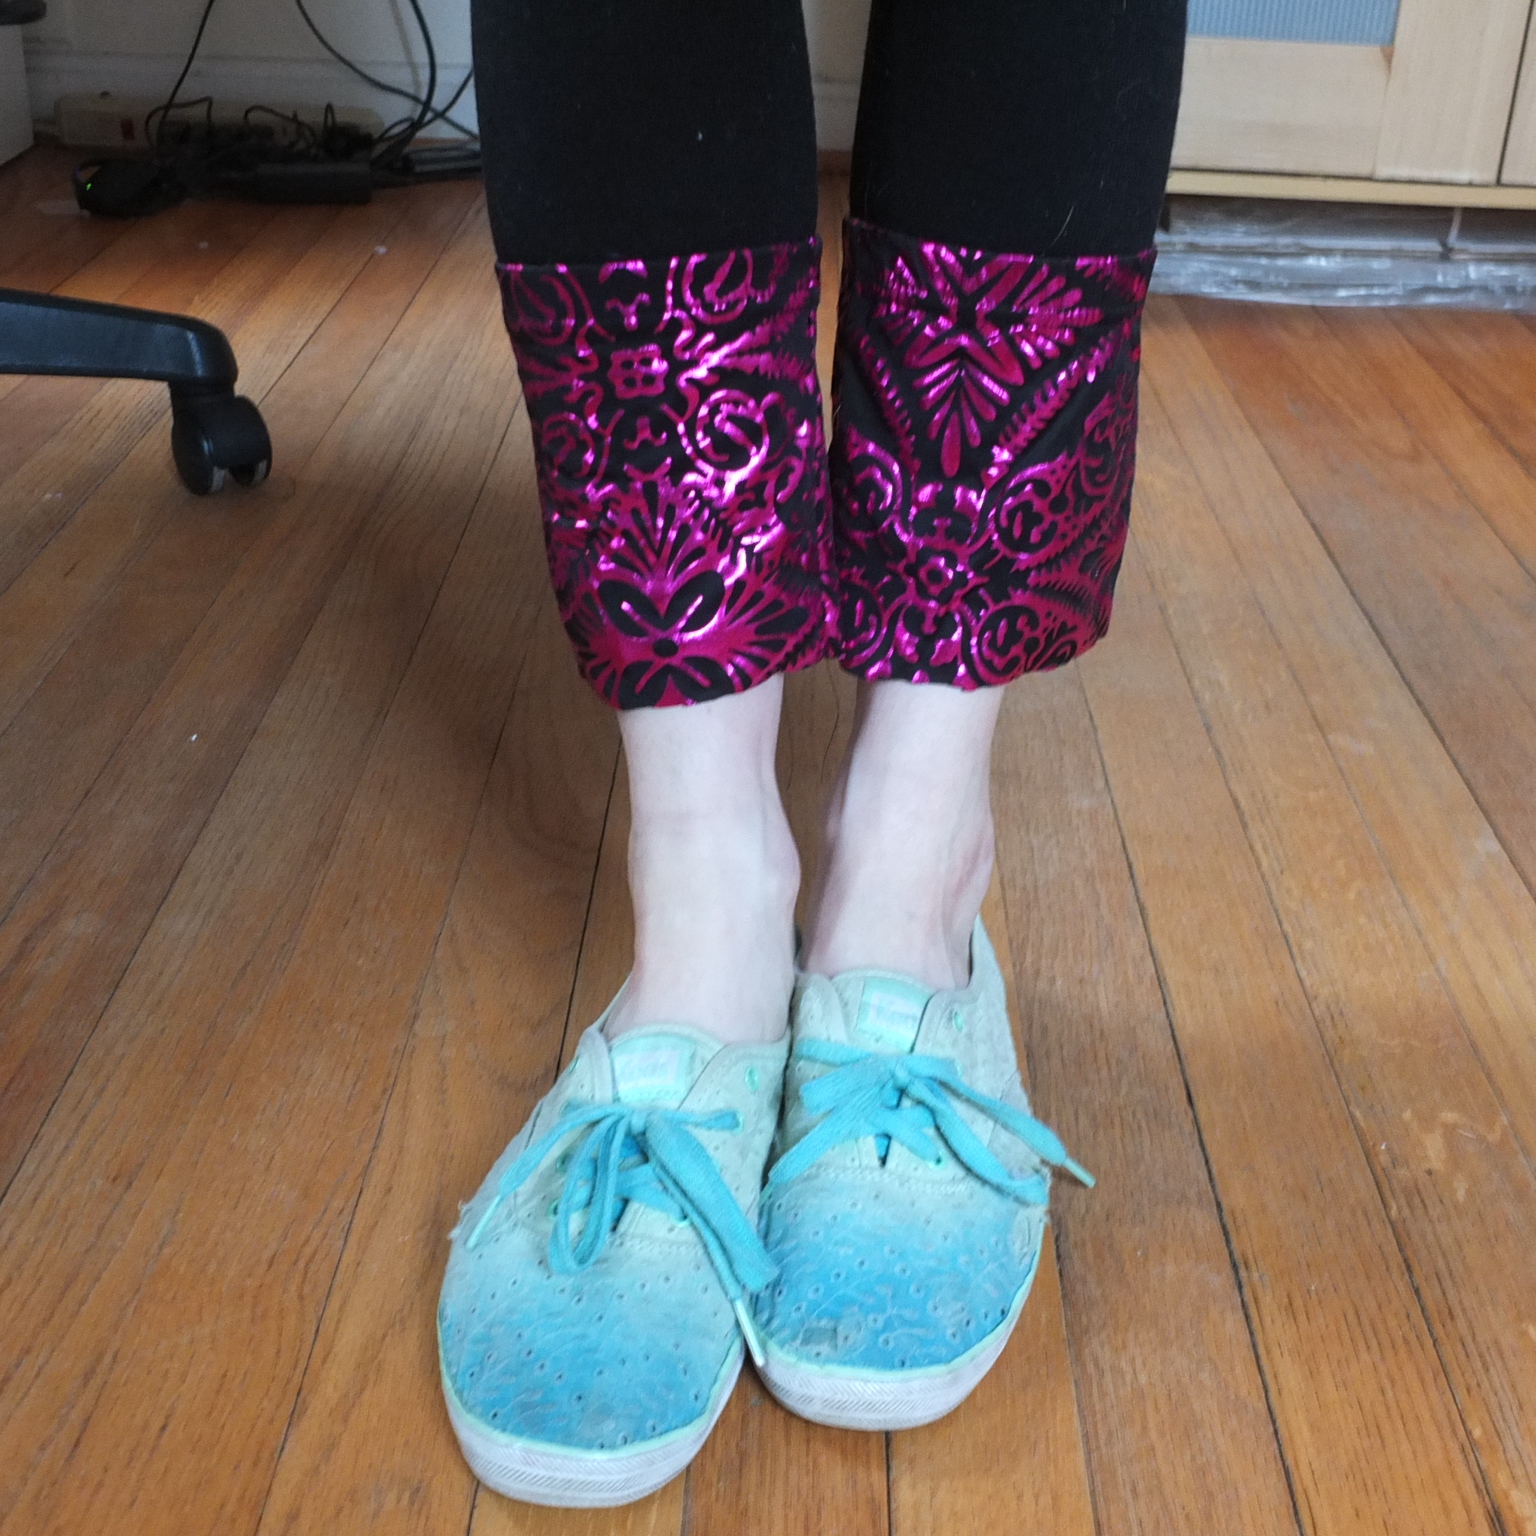
A shiny scarf mask sounds fun, but when I tried it on with clothes, I realized I wanted a little something more to make it outfit-worthy. So, with the remains of the top portion of the leggings, I set out to make some accessories: boot toppers and headband.


I wore the scarf mask and boot toppers this weekend on a date with my boyfriend (who said I looked like I was trying to be a ninja, and not in a good way. Sigh—we can't please everyone!). We were planning to go ice skating, but my best-laid plans, like my photos, went all asunder! I think the boot toppers would have looked adorable with ice skates, but I guess we'll never know!

I recently cut all my psychedelic ankle-length patterned leggings down to capris. Thanks for the inspiration for what to do with the leftover scraps.
ReplyDelete