Thursday, July 27, 2017

It's never just black and white


My boyfriend's parents traveled to Indonesia recently, and all they brought me was this lousy pair of culottes! I jest, of course. I'm actually delighted with these pants—with their summery length, unusual skirt-like overlay, and bold diagonal white stripe, they are unlike anything else I've ever had in my wardrobe...except my white-trimmed black vest, which has enjoyed surprising longevity since its first appearance in 2012. I've thought numerous times of getting rid of it, and every time, I'm glad that I didn't, because I love it to pieces (figurative, thankfully!) whenever I wear it! With its white trim angling gracefully downward, it looked like it was practically made for these pants!
 
Is it a skirt?
Surprise! It's pants!
 
 While you can never go wrong with black and white, for me, the color combo is an invitation to wear my most brightly colored accent pieces. Today's color pick was lime green, in the form of some heeled sandals I got for $3.50 at the thrift store, a similarly colored beaded bracelet, and a tiny peridot necklace that originally belonged to my grandmother

Wednesday, July 26, 2017

The "Yes it's another open-shoulder top" top


Short-sleeved tops are probably the least-worn type of "basic item" in my clothing collection. When it's cold or just cool, I gravitate towards full sleeves (or at least 3/4!), and when it's hot, I shun any type of sleeves and head straight for the tank tops. But when the temperatures hover between, oh, 74 and 83, those are the days that short sleeves are my friends! Those days are only a few out of our total 365, but today happened to be one of them. So I took the opportunity to wear a short-sleeved shirt that I had refashioned in the past month. 

Here's how I DIYed an all-around-poofy blouse into a sleeker shirt I can feel comfortable in!

Originally it had an elasticized bottom hem. Nothing that bubbles out around my waistline has any place in my wardrobe, so I picked out all the elastic shirring with a seam ripper. I thought this was going to be a quick fix unworthy of a blog post, so I never bothered with a "before" picture.

I thought this alteration would be enough to make the shirt wearable, but nope! I was still unhappy with the very loose fit. And the fact that the front skewed inexplicably sideways. Besides that, the loops that held the buttons left a big old gap running right down the middle of my chest. I decided to solve three problems at once by converting the standard button front into a snug-fitting wrap-around front.

I picked off all the buttons and saved them for later. 

Then, in the mirror, I wrapped the two layers around my body and pinned the fabric in place. Shimmying out of this pin-laden straitjacket was a challenge, but all in the name of fashion!

I reattached the buttons in their new angled line using my sewing machine.

I had fixed the fit and the see-through button placket, but there was still the matter of the sleeves. They were puffed, in direct contradiction to every sensibility I have. I had to do something about them—and that something ended up being slicing them open for the cold-shoulder look I am loving so much!

First I just cut a slit down the center of each, from the shoulder seam to the cuff at the bottom, but that wasn't a dramatic enough hole. 

I then began paring off tiny slices of fabric from each shoulder hole until I had just the size opening I wanted!

At this point, I was unsure how to finish the openings I had created, knowing that the delicate woven fabric was going to unravel at lightning speed. Last time, I had just melted the raw edges to seal them, to disastrously itchy effect. This time, I was going to have to do better. I thought about trying to overlock them, but I knew that, at least in my machine, that would just make the edges frilly, which is not an effect I desired. Ultimately I decided to simply fold the raw edges under and then sew over them with a zigzag stitch to mitigate the inevitable fraying.

That's all there was to it. You wouldn't think that the difference between an open-shoulder and sleeveless top is so great that they would fall into entirely different temperature brackets, but somehow I am more or less comfortable in my cold-shoulder tops even when I'd be cold in a sleeveless one. Will wonders never cease?

Thursday, July 20, 2017

Different DIY Cropped Flares


Cropped pants never really go out of style. While the overall silhouette is constantly in flux (wide-leg, skinny leg, flared, cinched...you name it, it's had its moment!), every spring, like clockwork, you can count on a new crop of crops to crop up! The short pant is perfect for the office, when you're tired of wearing skirts but the weather is just too hot for slacks (and you're still not sold on workplace shorts).

The best thing about cropped pants? They're so easy to DIY! Start with any old pair of jeans, cut off a few inches (usually the inches that are already ragged from years of dragging on the ground), and voila! Instant crops! Already have a pair of cropped pants, but need to make them more modern? That can be done too!*

 
Take, for example, my light grey capris. I bought them mainly because they only cost a dollar, but it's been a struggle to find ways to wear them. They're kind of a dull color...kind of an unflattering shape...they're all right...they just don't have flair!

To add flair, sometimes all you need to do is add flare. At present, one of the most notable trends in cropped pants is the cropped kick flare. A kick flare distinguishes itself as being a particularly dramatic flare, as opposed to just a slight widening. Here's how to turn ordinary straight-legged cropped pants into flared ones! All in all, it's a simple process that will result in a completely new look!

Turn the pants inside out and put them on. Put a pin on either side of your knee. The knee area will be the narrowest part of the leg, but you must give yourself enough space that you can actually bend your leg!
 
When making this measurement, it helps to position the pants securely against your thigh while you are still standing up; otherwise they will slide down your leg as you bend over, impairing your accuracy.
 
If in doubt about the height at which to place the pin, I suggest putting it at or near the top portion of the knee. This will help keep the curves less dramatic, which should be more flattering to your hips.

Put another pin at your hip, wherever you want the pants leg to begin tapering.

Put another pin at the inner thigh wherever you want the pants to begin tapering on that side. Mine ended up being significantly higher up the leg than the pin in the outseam

Next, sew! Your goal when sewing is to create two smooth seams that curve gracefully from the pin at the thigh, in to meet the pin at the knee, and then back out to meet the original side seam by the bottom hem.
 
If you're not confident in your ability to sew a smooth curve on the fly, then you should probably mark it before you sew. I just wanted to get it done, so I skipped that step!

You'll want to end your curve as close to the bottom hem as possible, but in practice, you'll probably have to do this 1/4 to 1/2 inch above the bottom hem, to allow for the extra layers of fabric that already exist down there. Sewing over that mess probably won't produce clean results.

Obviously, you'll need to repeat the same process on the other leg. I just used the first leg as a template for the second to save myself more tedious pinning in the mirror.

Next, iron the seams.

Next, you're done! Well, except for the finishing touches. For my part, I found that the original side seam was slightly more rounded on the left leg than on the right, making my left hip look huge. I took the pants back to my sewing machine to level off that curve. Then, I was done! For real!


*One more (really low-effort) trick to modernizing your pants is to simply call them by the right name. Remember when I once mulled over the difference between "gauchos" and "culottes?" I ultimately came to the conclusion that they were the same thing, but that "culottes" is what they are calling them now, while "gauchos" is so 2005. So it is with another variety of cropped pants—the capri pant. I first learned about capri pants circa 1999. When they hit the scene, capris were skin-tight, but it wasn't long before I saw straight-legged and flared varieties, which became a beloved part of my wardrobe for several years after. But by ten years later, the idea had become stale—just in time to return under a different name. While "capri pants" is still used as a generic term for all short pants, when fashion writers describe the looks that are in style today, they usually use the more generic "cropped" pant. So, while I wore my various capri pants well into the 2010's, I always felt vaguely frumpy. But just by refraining from calling them "capris," and calling them "cropped pants" instead, I feel 10x more fashionable! It's that easy!

Tuesday, July 18, 2017

DIY High-Waist Bikini


Over the past few years, when I've purchased swimwear, I've focused almost exclusively on bikinis. I have one distinctly athletic tank suit that I wear when I want to be, well, athletic, and not worry about my suit falling off. But for your average day spent poolside or a casual dip in the ocean, I almost always gravitate to a two-piece.

This year, though, growing bored with my selection of bikinis (I have a substantial amount of swimwear for someone who maybe goes swimming twice a year), I was delighted to read that one-piece swimsuits are becoming increasingly common. I decided to take advantage of their new popularity by finding one of my own. My only requirement was that it not be boring.
Eventually I found what I was looking for in a green-and-black striped suit with some flattering princess seams I couldn't pass up. There were several of the same suit available secondhand on eBay, so I waited until I found one under ten dollars, and then made my move. It was perfect. But only when I tried it on a second time, long after I could have conceivably returned it, I was disappointed to notice that it was too short for my torso (now I see why there were so many of them for sale)!  

No matter how I tugged it, either the bust would slide down to an unseemly level, or the leg openings would ride up to a height last seen on Baywatch. I've observed that high-cut swimsuit legs are currently coming back into fashion, but I've never found the style flattering, and I certainly didn't want to rock it myself!

However, the overall styling of the swimsuit was very similar to the retro/pinup/50's styles that continue to be a fringe fashion staple today. I decided I'd cut up my swimsuit and turn it from a one-piece to a high-waisted two-piece.

I have to say in advance that I did it wrong—so very wrong. I had no idea working with elastic fabric would be such a tribulation! While the finished product looks passable from a distance, I'm absolutely flustered by the disastrous nature of the work that got it there. But here, I'll let you judge for yourself!
I measured the spot where I ultimately wanted the waistband of the bottoms to lie, added an inch, and cut it.
I thought I was being smart by following the horizontal stripes, but as I finally got around to the other side, I learned that they hadn't been sewn perfectly straight—I'd lost almost an inch in height from one side of the front to the other. Mistake #1! 

Also, since the suit was made of two layers with a lot of gathers, I had cut the inside a lot lower than the outside, thus losing even more effective height. Mistake #2!

With nowhere to go but forward, I hemmed the waistband of the bottoms. I kind of wanted to put some sort of elastic band there, but in examining most of my other swimsuits, they didn't actually seem to have one, so I decided to do without it. Instead, I simply rolled the material under twice, then topstitched. Sadly, this was Mistake #3, as  some parts of the inner layer were too short to actually make it into the hem. Fortunately swimsuit knits don't unravel easily, so I haven't bothered to fix this mistake yet.

I started out with a stretch straight stitch on my machine, but that was taking forever, and seemed to be causing the material to pucker, so midway through, I switched to a three-step zigzag. As you can see, even in the few places where the zigzag itself turned out decent, it still made my suit waistband "do the wave."
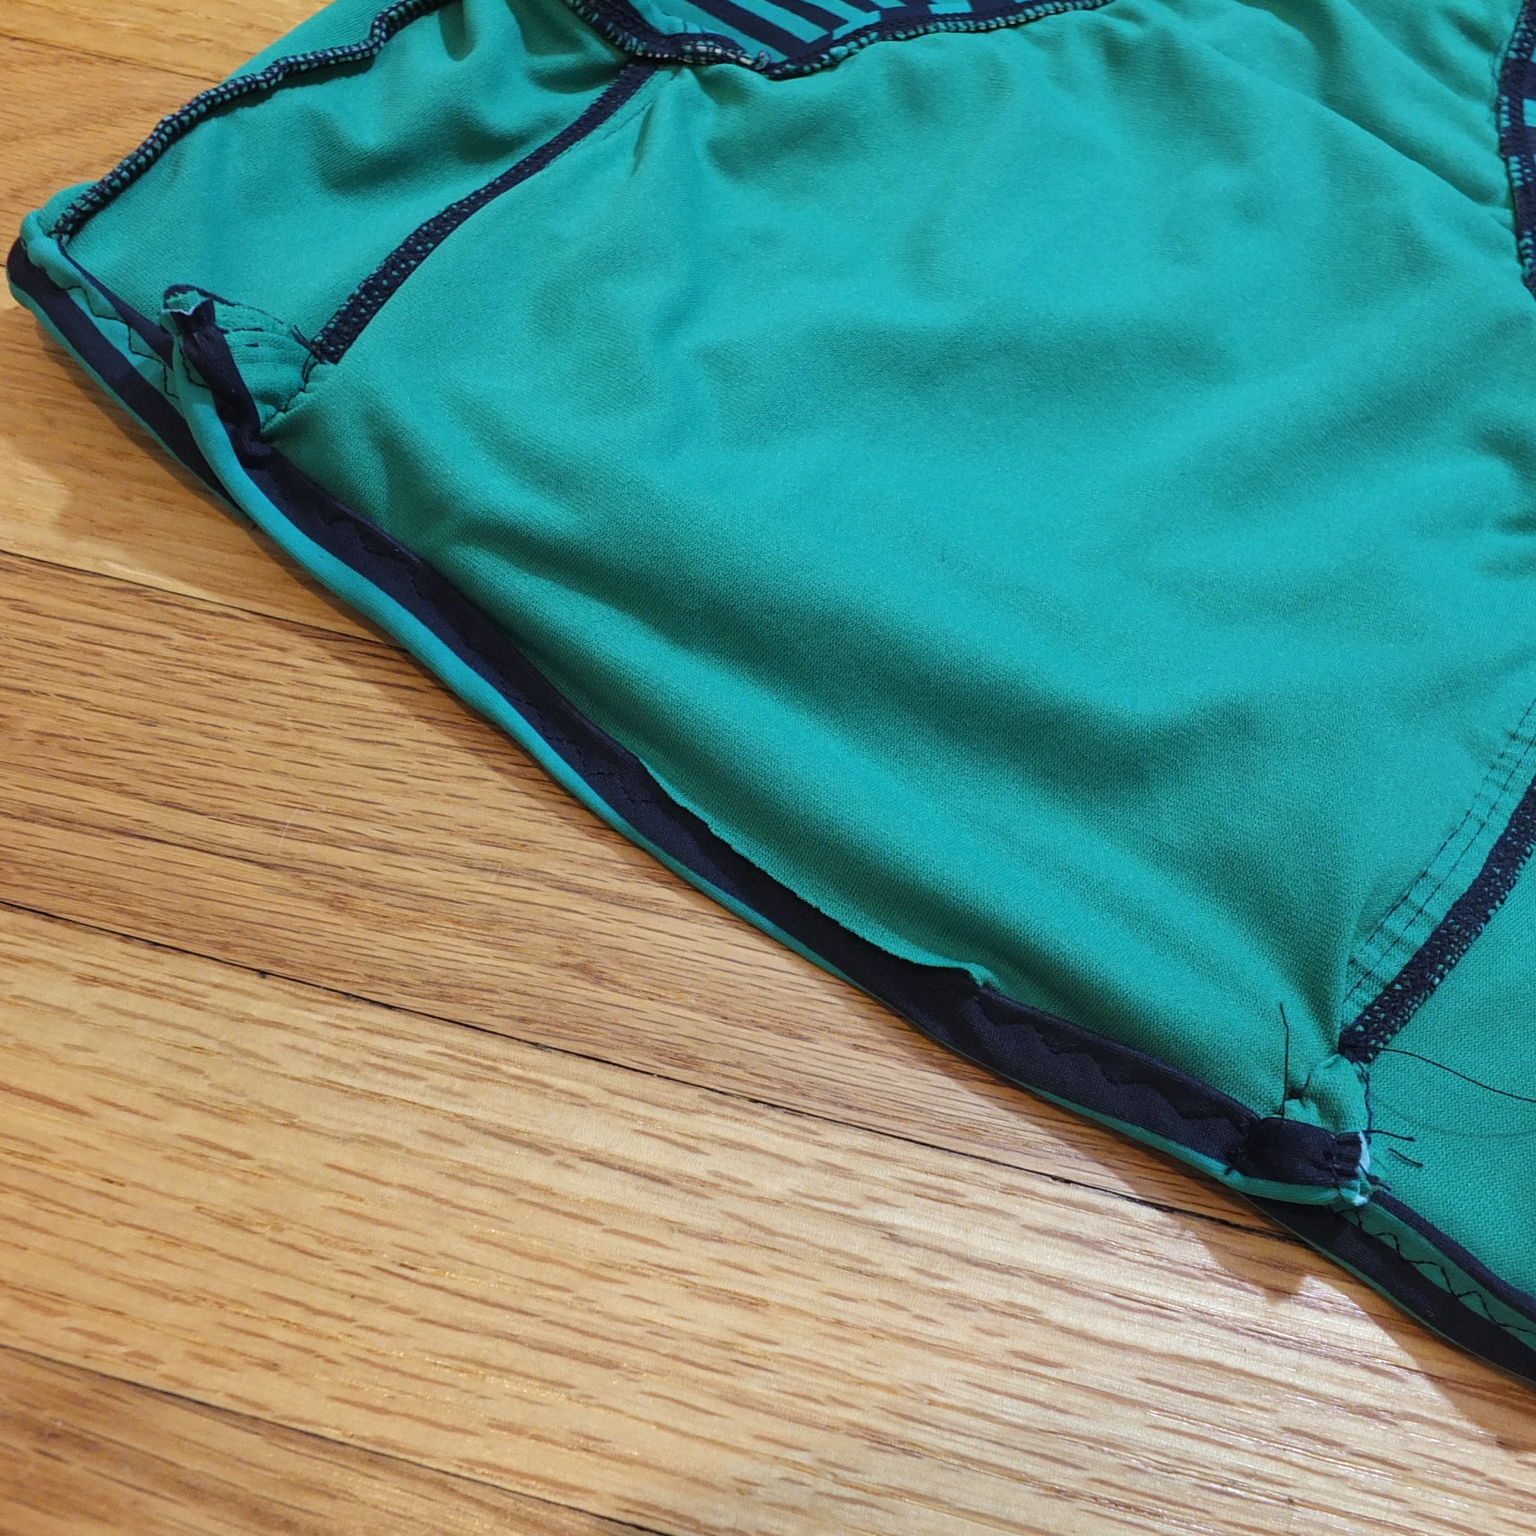
When I tried the suit on after finishing the waist, I found that it had stretched quite a bit and now didn't hug my body. My solution was to open up about an inch of each of the seams in the front and then re-sew them a little tighter. The picture at left shows an inside view of this correction.

With the bottoms done (at least as done as I could stand to make them without crying!), I started on the top. By "started," I mean I stuffed it into the bottom of my Projects Box so I could "think" about the best way to finish it. Three months later, I could not procrastinate any more. I consulted the internet about ways to sew elastic material.

While some tips were totally useless to me (buy a walking foot? Sounds nifty! Costs almost as much as my entire sewing machine? Next!), one, which advised sewing over a piece of paper, sounded like it might actually work. Since I'd had trouble keeping all the material together when I sewed the bottoms, I also decided to glue the hems down prior to sewing (usually I just use pins). I was proud of myself for taking this extra step in the name of quality, but alas! It was Mistake #4—the glue (Aleene's No-Sew temporary fabric glue) wouldn't hold the material, so all I did was make it goopy and unworkable until it dried.
As you can see from the picture, I also glued a narrow strip of paper to the top of the piece. The paper may or may not have been Mistake #5. It certainly didn't seem to stop the fabric from puckering, but it did make quite a mess in terms of removal. I had to soak it in water until it dissolved in order to get all of it off, and I can still see bits of it stuck to the seam—even after a soak, a wash, and a swim in the Chesapeake Bay!

I can no longer remember if I had the bright idea to reduce my thread tension while sewing the top, but if that's what I did, it was certainly Mistake #6! For whatever reason, the topstitching on my bikini top is loose, erratic, and unraveling. It looks less like a triple-step zigzag and more like a seismograph during an earthquake!

Even after all these mistakes, I nonetheless thought I had a Minimum Viable Product that I could at least wear once to the beach before throwing it away in despair (or before all the seams come out and I'm left accidentally skinny-dipping!).

So I wore it to go stand-up paddleboarding on Sunday evening!

I am proud to say that at no point did I end up accidentally skinny dipping, and the suit looks much the same now as it did before I started. However, I think after I get it out of the laundry, I might undo all my work and have another go at making seams that don't look like I sewed them while riding a roller coaster!

Monday, July 17, 2017

ElephanGirl

 
Yesterday, my boyfriend and I went to a big gathering on a beach. I wanted to wear an easy breezy dress that could double as a simple cover-up should I decide to go swimming. Fortunately, I had an unworn dress practically made for beach-going. It was one of those tube dresses with a smocked top that you can find at beach stores everywhere. When I was trying it on, it kept sliding down, so I decided to try to wear it as a skirt instead. I selected a solid chartreuse top to wear over it, and I thought I was done...but the top kept sliding down, too—the same elastic problem I had with my first choice of tops in my last outfit! Why does this keep happening!? I would complain, except that, once again, my wardrobe malfunction turned out to be a stroke of good luck, in that my backup shirt ended up an even better choice than the original.

In today's case, looking for a replacement top, I suddenly remembered I had the perfect shirt to go with an elephant-themed skirt—an elephant-themed shirt! I had just recently received it, and since it had puffed sleeves (the horror!), I had naturally set out to remove them as soon as I got it. Originally, I'd planned to cut off the sleeves, fold under the raw edges, and sew them down for a classic, smooth-edged armhole. But I ended up really liking the ruffled look on the fragment of sleeves that were left, and returned the shirt to the Projects Box so I could clean up some of the more ragged cuts. So on the morning of the gathering, in another last-minute alteration (these are becoming my specialty!), I did just that, then put the shirt on, and marched out the door.


But before I did so, I selected some sunglasses (blue to go with the blue on the shirt, rimless with a vaguely hippie aesthetic, which, incidentally, is something I could also say about the elephant skirt!) and a pair of black flat sandals.


The sandals are — surprise surprise! — a recent refashion as well. The fabric insoles had started falling off, so I cut my own insoles out of a piece of T-shirt and glued them to the shoes. I had only put the finishing touches on the shoes earlier this morning, and I was really curious about whether the fix was going to hold. Well, the best trial is a trial by fire, so I put them to the test by making their first outing a sandy, messy, beach. By the end of the day, they didn't look beautiful, but the glue was still holding! Pro Tip: If you're ever deciding between Tacky Glue or E6000 to replace the insoles in your shoes, choose the E6000. I did Tacky Glue on one foot, E6000 to the other, and the E6000 was much less prone to peeling—though the downside was it also showed through the fabric more.


It should be worth noting that the skirt came to me from Thailand via my boyfriend, the shirt came to me from Sri Lanka courtesy of my Sri Lankan friend, and the event to which I wore them was for Indonesian Americans! I am fortunate to have a lot of worldly associates, or this outfit would not have been possible. I might also note that I'm not usually drawn to elephant motifs, but I got such a big kick out of being able to wear two of them brand-new in one outfit, that I might just become an elephant fangirl. Ele-fangirl? Ah, now you finally understand my title!

Thursday, July 13, 2017

Cutesy princess-like


This is the "cutesy princess-like outfit" I mentioned a few days ago. I wasn't going to blog it, but since I brought it up, I think it's only fair that I let you see it!

It's actually a variation on the original, because the top I had planned turned out to have deteriorated elastic in the neckline, rendering it far too low-cut. Fortunately, I think this pale pink top might have been an even better choice, because it turns the whole outfit into a wash of pastels. Very summery.

The shoes, of course, are as pastel as shoes can be without being pure white. They are only worth noting for one other reason: they are the tallest shoes I've worn since I sprained my ankle, and when I first started walking around in them (at the office, after it was too late to choose a different pair!), my ankle regretted my choice. 

But after I'd settled into them for a few minutes, I realized that they're stretching a part of the ankle that's gotten stiff after the injury, so they're actually doing me a favor. How often can you say that your high heels are actually contributing to your health?

Wednesday, July 12, 2017

Salmon again


Lately, my favorite thing to shop for is festive shorts. Since last summer, I've collected 5 pairs of new shorts in varying styles of ornamentation (this influx of discounted decorative shorts must mean that they were popular 3 or 4 seasons ago, but apparently I didn't catch that trend), from frilly lace ones to ones with stars to neon embroidered ones (wait til I get a chance to show you those!) to these white ones with a bold floral print.

There are so many colors on these shorts, I could wear them with a multitude of tops, but I decided, as always, that the best top was a new top.

This spring, I made a concerted effort to fill out my wardrobe with solid-colored tops in every color. Originally the goal was just to get some T-shirts, but then summer happened and I realized that tank tops were a necessary addition to this endeavor. I almost met my goal in one single thrift store run, during which I acquired sleeveless tops in teal, purple, and even the elusive orange! Of course, no one was surprised when I got home and found that the orange top had a bit of a salmon hue to it. Orange has always been the red-headed stepchild of my closet, and part of the reason for that may be that whenever I try to buy something orange, it often actually isn't—and vice versa.

In any case, despite being slightly more pinkish than I'd expected, this shirt still worked with the florals in my aforementioned shorts.

What didn't work was the fit. This shirt was ruched. I once mentioned, long ago, that while they say ruching can produce a flattering and slimming effect, that only works if the ruched item fits very tightly. If it does not, the ruching just serves to add bulk. In this case, I found that all the ripples in the shirt were piling up around my waist, making me look a bit chunky up top.

A few minutes before I was going to wear this outfit out the door, I decided to take my chances on an alteration, adding a couple of seams to the back of the shirt to reduce some of the volume. 
 
 
Fortunately my last-minute gamble paid off. The seams ended up fairly smooth and evenly placed (on the first try!) and did a bit to improve the fit. The change wasn't as drastic as I would have preferred (the casual observer might not even notice the difference!) but it was just enough to make me feel better about my overall look.
 
I know the blurry mirror-selfie isn't the best basis for comparison, but
I think we can all agree I look thinner in the picture on the right (after I altered it).
 
To finish off the outfit, I wore lace-up brown sandals and orange lips that perfectly matched my shirt!
 

Thursday, July 6, 2017

American girl


We did not have big plans for the 4th of July this year; hence, I did not plan my outfit until the day of. Fortunately, over the past year, I'd acquired a number of new clothes and accessories that perfectly formed a cohesive collection.
  • Late summer, 2016: I found these blue denim shorts with a white star print at Rugged Wearhouse. I wore them a couple times already (I think?), but since I can't actually remember when that might have been, they still felt fun and new when I finally donned them for the occasion they seemed just made for!
  • Early fall, 2016: I don't often shop at Marshall's, but I think I was there looking for some kind of housewares for my Airbnb. Of course I can never shop for necessities without also shopping for accessories, and I found a pair of magnificent cat-eye sunglasses with an American flag motif. I snatched them up and waited almost a whole year to wear them for the 4th of July!
  • December, 2016: While my boyfriend was desperately seeking warm-weather clothes for a surprise hot spell when we visited my brother in Texas, I found a white sleeveless blouse with a lace mesh top for 5 dollars in a thrift store. This is my first time wearing it. Over the past 2 years, I've tried this style a number of times (I wore a similar blouse for Independence Day last year but hated the fit. I got an off-white one this year too, but I only got to wear it once before the lace overlay snagged in a million places and became hopelessly deformed), but this top is my favorite of the bunch! I won't hate this one, ever! I know it!
  • May, 2017: I'm not much of a sneakers girl, but my boyfriend (who, being obsessed with working out, is naturally a sneakers guy) persuaded me to get some American flag sneakers when we were at the Reebok outlet in Orlando. They didn't have the style in his size, so I guess he wanted to live vicariously through me. Though I'm still not a sneakers girl, I guess if you have to wear sneakers, at least they can be ridiculously patriotic!
  • July, 2017: The day before the 4th of July (that was the 3rd of July, if my math is correct) my clothes-donating friends visited my house with a couple bags of goodies for me. I was absolutely delighted when I found an oversized red handbag in the collection! What a perfect addition to an Independence Day outfit! I jazzed it up with a blue ribbon around the strap, and used it to carry my picnic to the fireworks display.
I would probably wear any of these items by themselves any day (except maybe the sunglasses—those seem like they're made to be saved for a special occasion), and most of them are new and trendy. So wearing this outfit, I felt like a more patriotic version of my best self. Patriotic, but not over the top. Not that there's anything wrong with being over the top—it is frequently my look of choice!—but for a low-key last-minute celebration, I felt like looking classy was the best choice.

In the interest of looking classy—and since I had some extra time to get ready, I curled my hair (but it was apparently not enough time for the curls to fully dry, so they didn't stick around long!), put on my second-reddest lipstick, and my bluest eyeliner. At the last minute, I added glitter to the eyeliner, because what's the fourth of July without a little sparkle? Of course, that effort was completely wasted, because I spent the entirety of the sunlit hours hiding my eyes behind my snazzy reflective sunglasses.

Monday, July 3, 2017

Breaking the shorts barrier


As you might recall, I can and will wear almost anything to work, but a few things I won't wear are:
  • Clothes with all-over sparkle (at least without covering some of it up)
  • Anything that requires a "stunt bra." Not my word, just something I read in an article—but it perfectly describes the whole family of bras that you sometimes have to employ to prevent them being visible under certain skimpy clothing.
  • Crop tops
  • Leggings as pants
  • Shorts
I have never worn shorts at the office. I have worn capri pants, culottes, and some really short skirts, but shorts have been forever off limits in my self-imposed workplace dress code.

Today, though, I was feeling a little feisty. It's Monday, the third of July. We have tomorrow off work. We had yesterday off work. But we do not have today off work. Who gives their employees the 4th of July off, but makes them come into the office the day prior, denying them a glorious 4-day weekend just for one little unproductive Monday? My employer does, that's who. Practically half the campus has taken the day off. Those of us who remain are here mostly alone and mostly against our wills.

Seems like the perfect day for some quiet rebellion. If I couldn't actually be on vacation, I could at least dress like I was on vacation—today was the day I would wear shorts!

Rebellion or no, I still didn't want to show up to the office in short shorts, so I limited myself to the one pair of knee-length shorts in my collection. These shorts happen to be quite the artsy garment, with angular cuffs and silver studs all over them. They are a hard look to pull off at the office. I couldn't go too casual on top, for the obvious reason that I'd look like I just rolled in out of the gutter; nor could I go too dressy on top, because the punky shorts were clearly not going to play nice with any preppy blouses. Furthermore, the top had to sleeveless, because today's high was forecast to be 92!

This green knit blouse did just an OK job of ticking all the boxes—it had the casual-but-not-too-casual feel that was necessary for marrying embellished jean shorts with a work environment, and I wore it tucked to give it an extra element of refinement, but I felt like the ruffles were slightly too prissy next to the rocker vibe of the shorts. Whatever, I wore shorts!