As promised, here's the story of how I altered the hoodie I wore in my last post.
A couple of years ago, I acquired an eBay lot containing two bizarre terrycloth hoodies. The original seller claimed they were swim coverups, but I just couldn't see myself ever wearing either of them that way. They were soooooo cute with their cartoonish sea creatures, but just not practical. First off, the terrycloth was way too warm. I guess that's fine when you first get out of the water, but it would grow old quickly in the hot sun. Second, they just didn't fit very flatteringly. I relisted them for sale. One sold after a few weeks on eBay, but the other never got a bite (ha ha, fishing joke!). One day my boyfriend saw it in my pile of clothes to donate, and exclaimed "You should wear that to a rave!"
I was skeptical, but he loved it so much, I decided to give it another chance. Although I still wasn't thrilled about the idea of wearing heavy terrycloth in the summer or for dancing, I decided that maybe the shirt would be wearable if I just made it sleeveless.
I removed the sleeves with a seam ripper. If I wanted to go for the thug look, I would have stopped right there, but I decided to aim for a little more polish.
Then I removed the red strips facing the outer edges. I planned to re-use them to face the new shoulder openings.
Next, reattaching the shoulder facing. This was where it got tricky. The original facing was for an arm opening that was a little smaller than the new shoulder opening, so I didn't have quite enough red fabric as I needed. No worries, though—it was a stretchy jersey, so I just stretched it to fit over the new opening.
I ripped out the original armpit seam from the facing and lined up its center with the shoulder seam.
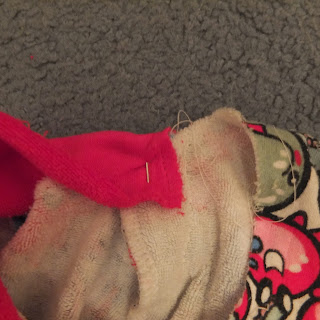
Then I folded it over the raw edge of the shoulder seam, and pinned it in place.
Then I pinned one end of the seam facing over the raw edge at the bottom of the arm opening.
Then I pinned a few strategic spots between them. This was just to get a feel for whether I would like the new shoulder opening where I was putting it.
It looked OK when I tried it on, so now it was time for the real thing—sewing it down. I only sewed the inside layer to the inside of the shirt, stretching as I sewed the two pieces together since the sizes didn't quite match up.
(I forgot to take a picture of that part)
But for the outside, I did a proper folded-under seam. To get it to stay in place while I was sewing, I coerced it with a flatiron first (easier than getting out the real iron).
Once I had a nice, somewhat-folded-edge, I flipped it over the raw edge of the arm opening and sewed it down.
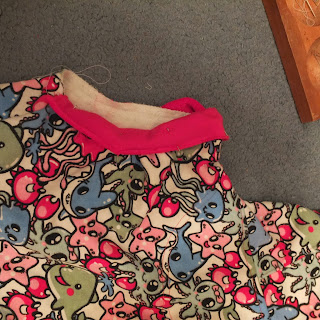
Here's how it looked after it was all sewn down.
After that, I was finished!
The inside of the armpit area looks atrocious,
as I had trouble getting so many layers of thick fabric to lay down neatly (over the taken-in seam that I refused to trim, just in case I want to restore it later) while also maintaining their unnaturally stretched shape, but on the outside, it looks like it was just made to be a tank top! It's a little shorter and wider on me than I prefer, but its adorable pattern helps make up for the less-than-perfect fit.
I finally wore it for the first time – taking my boyfriend's advice – to a rave. I kept it partially unzipped for breathability and never put up the hood...since I was still worried it was going to be too hot. Three-plus hours of nonstop dancing later, I was finally satisfied—you can wear a terrycloth sleeveless hoodie without dying of heat exhaustion.


No comments:
Post a Comment