But don't worry, the Unfashionista would never stoop to buying expensive clothes! If my cheap boots are too big, I will make them smaller!
Normally when I get clothes that are too big, I take in the seam on the sides with my trusty sewing machine, and boom! Done in 60 seconds! I tried that with these boots, and my sewing machine jammed so badly that it was 2 weeks before I dared touch it again. Obviously trying to sew up 2 thick layers in such proximity to the rigid parts of a boot was just too much for my machine. I was going to have to get creative.
Fortunately, I had just purchased a staple gun a few months ago, inspiring me to try a new, more industrial, method of tailoring my shoes. It works the same way as taking in a seam on any fabric garment—the only difference is that the material of the boot is thicker. Let the tutorial begin!
Here's what you'll need.
A staple gun, a pair of needlenose pliers, and (optionally), a pair of those pliers that have curved jaws (hey, I'm an unfashionista, not a mechanic—I have no idea what their proper name is!)
Step one is to mark where on the boot you want to make the new seam. I put it on and pinched the fabric on either side of the back seam. Your new seam may not be in the back, but you do want to use an existing seam, so that you don't end up with an extra one when you're finished. I pinched just enough fabric so that there wasn't any slack around my leg, then stuck a pin in to mark the spot. These pins are only markers, so they don't have to actually go all the way through. You could use a pen if you are feeling particularly confident or working with a washable material.
Next, take off the boot, then pinch the fabric exactly where you have the pin. In the next step, you're going to move the markers from the outside of the boot to the inside.
This is an inside view. I am pinching the boot where the marker was, then I've stuck a new pin on the inside to mark where the pinch is.
Do the same for all the markers until you have a nice line of pins on the inside of the boot. This line marks where you will create the new back seam.
Next, place the boot on some kind of soft yet firm surface. You need something that's strong enough not to collapse under the pressure of the stapler, but soft enough that the staples will go into it easily. I've chosen to use the box the boots came in.
Pinch the fabric around the first marker so that the original seam forms the top of the fold. Press the folded fabric onto the stapling surface.
Bam! Staple away!
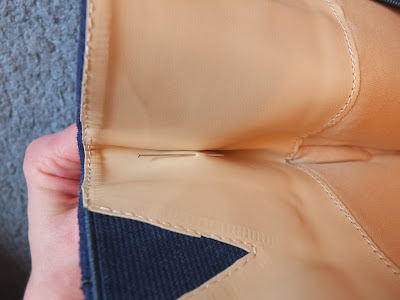
If you have done it correctly, your staple will have punctured both layers of fabric and will be sticking through on one side. You can see the original seam very clearly in this shot.
Fold down the ends of the staple with the pliers. I like to start with the needle-nose pliers because they're more precise...
...Then finish up the job with the curved pliers. The rounded jaws leave a nice opening for the bulk of the fabric to fit into, enabling me to close the staple more tightly.
After all the markers have been replaced with staples, it's time for a fit test in the mirror! I haven't stapled the top of the boot, because it's lined with a glossy vinyl that's probably going to take more lasting damage if I do it wrong. I like the way it looks, though, so I'm going to got ahead and staple up the top as well.
Here's the finished product! I'll let you know how the stapling job holds up after I've given them a full-day trial.
A caveat: I'm pretty sure staples on the inside of your boots will snag pantyhose and other fabrics, and could potentially scrape your legs. So if you value what you put inside these boots, you might want to cover the staples with a bit of soft tape or something.


 There's no single way to decide whether to wear your jackets open, closed, or partially closed. But the choice can have a huge impact on how you look, so consider it wisely!


