Thursday, May 26, 2016

Wedding on the Beach


I've actually owned this dress for 3 years without wearing it. Normally when I have an article of clothing that's gone unused that long, I would consider it unwearable and let it go. But I knew that someday, some day, I would be able to attend an event worthy of such a dress, and finally the event came in the form of the second of two weddings for the same couple. This time, the venue was a beach on Hawaii, and the color scheme was unspecified, so I was able to wear the green dress as planned.

Of course, I had to do a ton of alterations first—sew in some pads so I could wear it without a bra, shorten the straps, lift up the plunging V-neckline, and sew the sash down at the waistline so it didn't sag.

Since I was heading to the tropics and wanted to celebrate, I didn't skimp on the summery pastels in the rest of my outfit. Mirroring the pale pink gems in the buckle, I wore a pair of pink glittery jelly sandals.


I put on pale green butterfly earrings. The outfit also went strikingly well with my favorite green cat-eye sunglasses!


After the party was over, one of the wedding guests nicknamed me Tinkerbell, for my propensity to flutter around on the dance floor.


This had nothing to do with the contents of this cup in my hand, but everything to do with the pink ribbons they gave us to wave at the bride and groom after the ceremony. You can't give a girl a handful of streamers that perfectly match her outfit, and expect her not to act like a fairy!

Wednesday, May 25, 2016

DIY Beach Dress


This refashion ended up being so complicated, it was almost like sewing something from scratch, without the benefit of a pattern!

It begins a whole summer ago, when I was at the beach. Tired of fighting with sun hats and umbrellas, I decided I really needed a swim cover-up. It's my arms and shoulders that take the brunt of the sun, so I wanted something that would keep them protected. That meant I needed something long-sleeved, but light and airy enough that I wouldn't get hot while wearing it. I explored the shops. Ocean City has no shortage of cover-ups, I learned, but they are mostly sleeveless or strapless, and wouldn't do at all. I checked a few outdoorsy websites and a few fashion websites, but still couldn't find anything to meet my exacting standards. So, I decided to make my own!

I started with a sundress I already had in my closet. There wasn't anything wrong with it, but I didn't love it, and the last time I'd worn it, both the straps had broken off, so it was due for some alterations anyway. I was just going to alter it way more than it could have ever imagined!

There was plenty of fabric in the bottom tier to make sleeves out of, so my plan was basically to remove the bottom tier and move it to the top.

This, however, would necessitate lowering the bodice, so first I had to pick out all the smocking in the back. The straps just kind of fell off at some point during this task. No photos of this step, sorry!

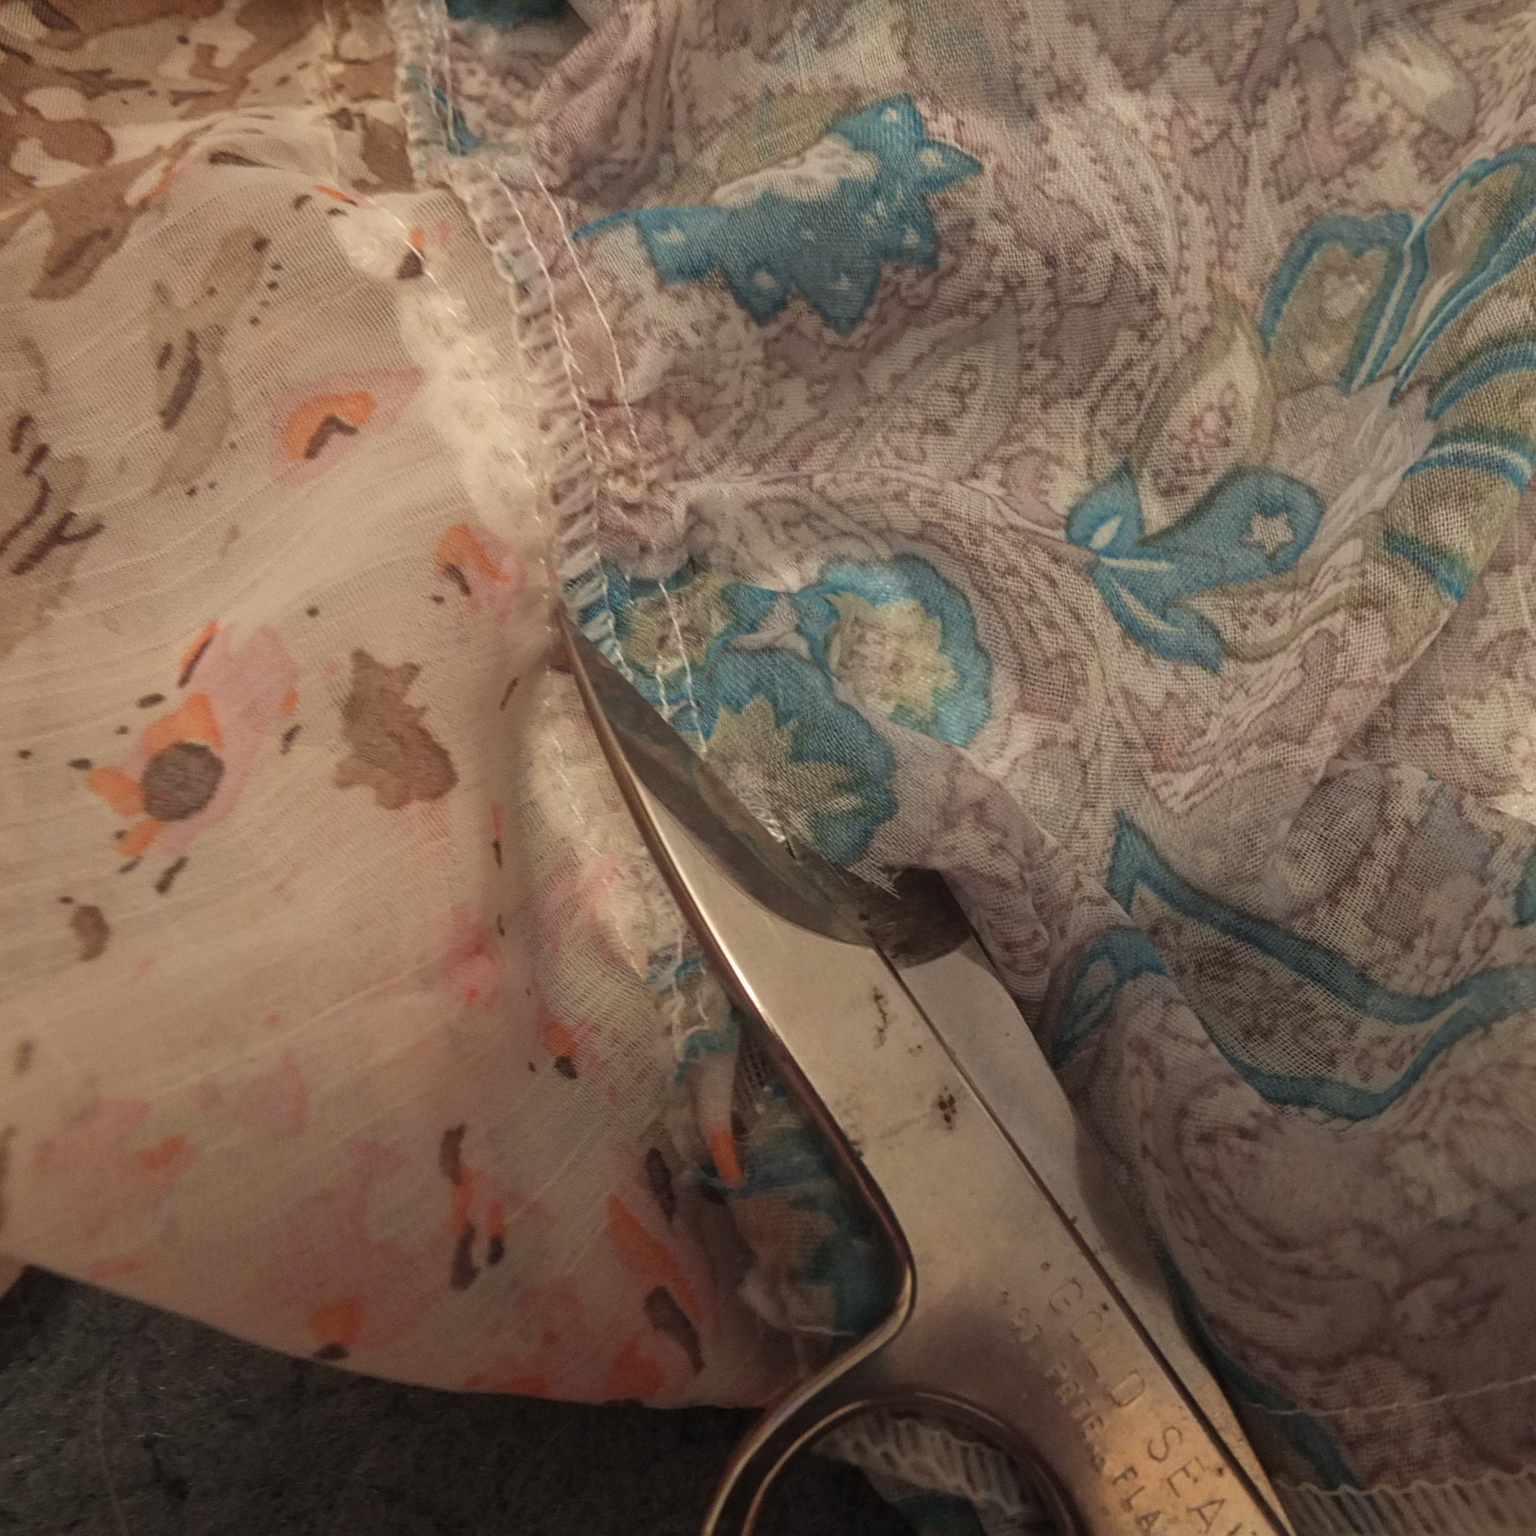
Next step was to remove the bottom tier, which I did the quick and dirty way, with scissors (as opposed to a seam ripper!)

At this point, I decided I wanted new dress to have an open front, so I could throw it on and off like a robe. I decided to open up one of the existing side seams for that purpose, which meant it was time for seam-ripping.

If I had had some foresight, I would have noticed that the lace trim strips between each tier were sewn all around the dress and were joined at one of the side seams, so I should have opened that seam. But that didn't occur to me til later, so in the end, I also had to cut through each piece of lace.

Now the former dress was basically one big long infinity scarf (the bottom tier) and a sheet of fabric made of three pieces (everything else). 

I wrapped the sheet around me to get an idea for where I wanted it to lie when finished, then measured how much distance there was between the top of the fabric and the top of my shoulder. 

Measuring yourself while holding a voluminous piece of fabric around you and while wielding a heavy camera is not a task for the faint of heart, but after all that effort, I determined that I would need my fabric to be about 10 inches long, to form the yoke. 

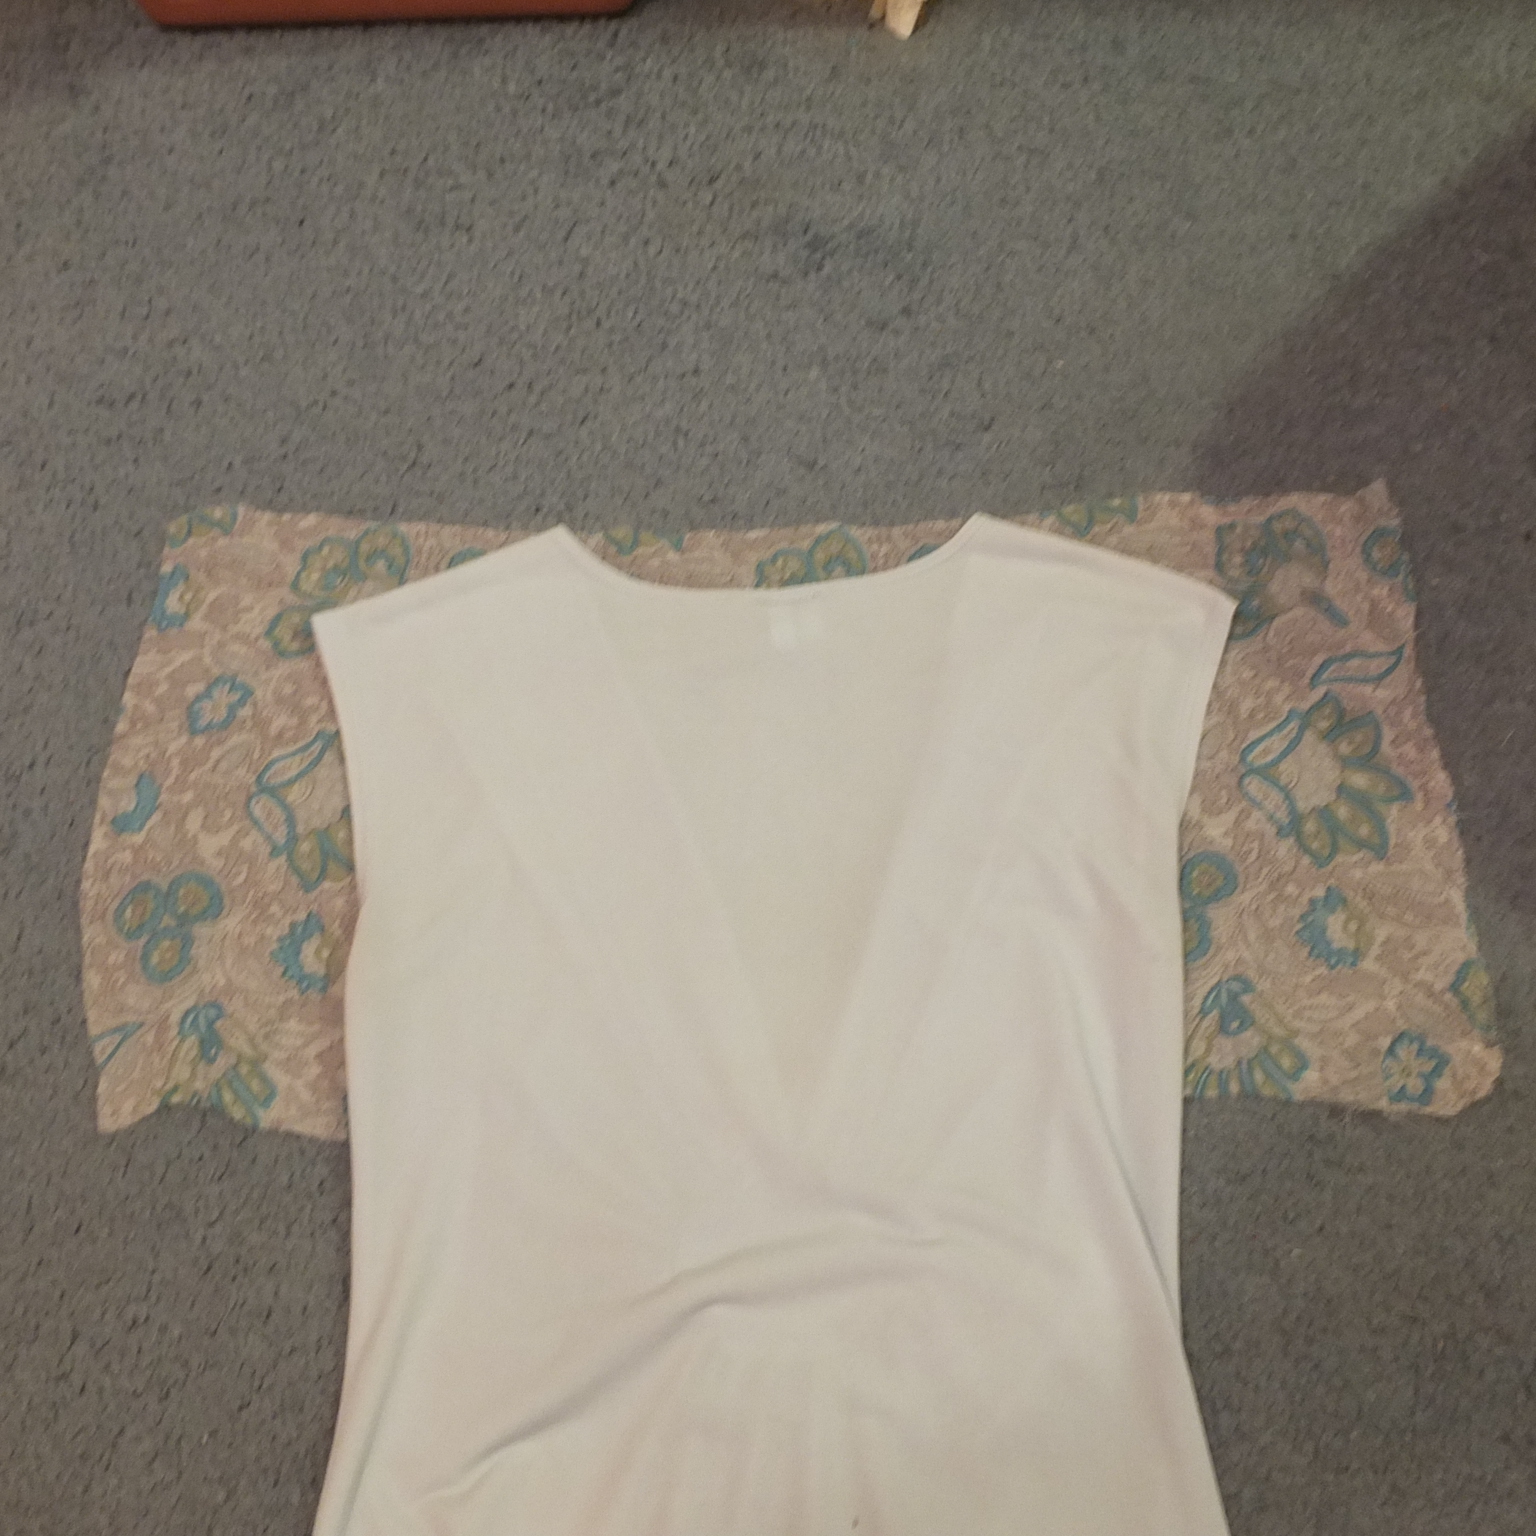
I laid the fabric next to the existing bodice to determine the width.

Then I marked the height, adding an inch (for a total of 11 inches) for seams, and cut the two pieces of fabric out. They  were still joined by part of the original side seam, so I had to rip that out after the cutting was done.

Next, the neck. Since I was going to have an open front, I didn't want to create a neckline for the front yet, but I would need a neck opening for the back. I used a shirt with a neck opening that I thought would be a good size, and traced around it. Then I cut, setting it in by a half-inch to allow for a shoulder seam.

Finally, the time for cutting and seam-ripping was done, and I was ready to start sewing! I began with the shoulder seams. In fabric this thin, it was really hard to determine which is the "right" side and which is the "wrong," but I did my best to put the "right" sides together and then pin and stitch across the top of the shoulders, using the longest stitch my sewing machine has. Later on, I planned to reinforce those seams once I was sure I liked their placement.

I cut down the middle of the front of the yoke to create the front opening.

Then, I set about attaching the yoke to the skirt. Since this fabric is so light and slippery, I used safety pins rather than my usual stick pins which kept falling out. (Shown here before pinning)

Then I tried it on in the mirror to see how it was turning out. Looked OK, so I went ahead and replaced the safety pins with stick pins, and sewed over them (again, with a long basting stitch) to make the attachment permanent.

Now it was time to attach sleeves. I debated with myself about whether I should cut proper inset armholes, like a normal shirt, or just add them to the existing boxy thing I had. Ultimately, I decided on the latter because it would be simpler, hoping that with such a drapey fabric, it wouldn't matter that the sleeves were attached somewhere past my shoulders. And if I didn't happen to like it, it would be easy enough to remove the seams and try again.

It turns out that the bottom tier of the dress was just tall enough to fold in half to form a sleeve. I measured enough length to make a sleeve that would at my natural shoulder, knowing that I would not need quite that much since the shoulders of the dress were already so extensive. Then I used that piece as a template to cut the second sleeve.

Turns out the sleeves were just a tad smaller than the openings I'd left in the shoulders, so I sewed up the side seams to reduce the arm opening, then attached the sleeves to the shoulders, finally sewing the seams in the bottom of the sleeves.

I now had something recognizable as a dress, albeit with a lot of raw edges! I had to decide how to do the front closure, so after a few days of thinking about it, I decided I would use ribbons to tie it in two places: once at the bust, and once at the neckline, for a nice, high, sun-protecting (but optional) collar.

That meant I first had to cut the square front into a round neck.

Then I finished the neckline using a rolled hem. I'm not very adept with a rolled hem yet, but I do appreciate how easy it makes hemming a thin fabric. Just fold it over, stick it into the curvy part of the rolled hem foot, and start sewing! One of these days, I'll figure out exactly how do a rolled hem so it's not all wavery, but I'm just pleased I got it at all.

My next step was to finish most of the remaining edges. Empowered by my "success" at the neckline, I chose to do another rolled hem down the front, which resulted in more wavery lines, but whatever. I can only go forward now!

To make the ribbon tie, I used one of the original side-ties. 
I cut it in half, sewed up the raw end, and attached it to the neckline in such a way that it would look natural when hanging open. 

Then I did the same for the tie in the bust area. 

Now the front was finished, and all the was left was to finish the sleeves.

They were excessively long, but I kind of liked them that way (a sun shield for my hands!). At the same time, I knew they would get in the way and wanted a way to pull them up when needed. For that, I went with more ribbon ties, this time using the original straps. 

First I hemmed the ends of the sleeves by folding them over three times, creating a tunnel in which to house the ribbons.

I lost or didn't take any pictures after this point, so you'll have to use your imagination.
Using my bodkin, I threaded the ribbon through the sleeve hem, then, because the ribbon wasn't quite as long as the circumference of the sleeve opening, I sewed the two ends together so they couldn't get drawn back into the sleeve.

Now I can wear the sleeves long and natural, or tug on the ribbons to gather them up above my wrists, as you can see in the two photos below!


I had to wait a whole year before I could wear this dress (as you might have guessed, I don't go to the beach much!), but finally I had my chance in Hawaii.

Here it is with both ribbons tied

And here it is with the collar open for an easy-breezy look!
It didn't fall apart, so that's a plus, though after all that work, I'm honestly not sure how much sun protection it actually affords.

Sunday, May 22, 2016

Going out in cropped flares


I made these pants.


Well, kind of.

I had a pair of old jeans, and seeing as cropped flared jeans, holey jeans, and jeans with fringed hems are all "in," I decided to work my DIY magic on my old pants. This post will not be about that process (because it was kind of a long story, and I thought it best to break it up). Instead, it will be a simple share of the outfit I wore when I wore the newly altered pants for the first time.

It's simple, so I won't go into too much detail, but I will note that because the jeans were a little large on me, I opted for a very fitted tank top to balance out my upper and lower portions. Beyond that, it's your basic jeans-and-a-t-shirt! With flare!


Friday, May 20, 2016

The Seasonal Switch

As you probably recall, the seasonal wardrobe switch is when I take the upcoming season's clothes out of storage and put the old season's clothing away. Since this event is one I anticipate with entirely too much ardor, and I am constantly tempted to jump the gun, I have to make strict rules as to when it can happen.

Surprisingly, though, I've never really written the rules out, so I'm constantly changing them. This is the year it all changes. This is the year I detail the exact circumstances under which each wardrobe switch can occur. 

Rules for the spring switch

  1. The transitional wardrobe (consisting mainly of short-sleeved and lightweight longer-sleeved shirts) comes out in the spring, and the winter wardrobe (the bulk of my sweaters, anything corduroy or fur-trimmed, and my snow boots) goes away. In this and all switches, a few pieces from the previous season are kept in back corners of my closet, in case of travel, or freak spells of unseasonable weather.
  2. I must wait until the daily highs have reached at least 60­­°F for a week before making this switch. A week consists of seven consecutive days, not necessarily a Sunday through Saturday.
  3. If the switch has not yet occurred by April 1, I can make it as soon as the forecast highs are above 60 for a week.

Rules for the summer switch

  1. Summer clothes (consisting of sandals, sleeveless clothing, and shorts) comes out during this switch. Any remaining winter clothes and boots must be put away.
  2. This switch must not occur until forecast daily high temperatures have reached 75°F for a week.
  3. If the transition has not occurred by June 1, I can make it any time.

Rules for the fall switch

  1. Transitional clothes come out at this time, and summer clothes get put away.
  2. The fall switch must not occur until daily high temperatures have dropped below 75° for a week. In the spirit of true summer loving, I do not make any kind of allowances for an extra-long season of warm weather. I would happily keep my summer wardrobe out all year if I could!

Rules for the winter switch

  1. The winter wardrobe comes out at this time, and the transitional wardrobe is put away.
  2. This switch must not occur until the forecast peak highs have dropped below 60° for a week.
  3. If the switch has not occurred by December 1, I may make it any time.
You'll notice the winter and summer switches only require a forecast of temperatures meeting the threshold, while the spring and fall transitions require those temperatures to already have been reached. The reason for this is that my transitional clothing collection is worn two seasons out of the year, so I prefer that those seasons are as short as possible. Secondly, my transitional clothes are just plain boring. They really only consist of a few items that are too warm for summer, but not warm enough for winter. With such a narrow selection that fits those criteria, it's not surprising I get tired of them quickly.

This year also marks a revision of the temperature threshold for summer. Highs 80 and above previously defined the summer season, but I have now expanded that to highs 75 and above. I am perfectly comfortable in sandals and tank tops when it's 75 degrees out, and it would be nice to have those options available for evenings and weekends (even if they would surely not be warm enough for mornings and days at the office). Plus, my summer collection is also my most numerous, so this rule change would allow me more time to wear it.

This year, ironically the year that I finally wrote down the rules, is also the year I threw them all to the wind, unpacking the summer clothes on May 5, when the weather was still rainy and barely topping fifty degrees. There was method to my madness, however; I was about to embark on two almost back-to-back trips to warm climates—New Orleans, Louisiana, followed by Hawaii just 4 days after my return. Because both of those trips would necessitate the wearing of lots of warm-weather clothes (and because by the time I'd returned from both, it would surely be summery back home), I had to bring out my summer wardrobe early.

For New Orleans, I did hold back the collection of new clothes that I'd been amassing over the winter, but while I  had my little break between travels, I got to enjoy that moment when I lay all of them on the floor and admire them before slowly trying to work them into my daily rotation! A few of them came to Hawaii with me, and just may show up on a fashion blog or Facebook near you!

That's 4 new dresses, 1 skirt/top set, 1 vest, 5 shorts (all too big, sadly), 1 vest, 10 sleeveless shirts, and 2 summer sweaters.
Can you guess which item was a gift from my boyfriend?

And then there are the shoes. I really went overboard over the winter and bought the same pair of sandals in two
neutral colors. I was thinking they might be good replacements for the black wedges I've had since 2012, but who am
I kidding? 5-inch heeled sandals will never replace a 3-inch wedge. Yet another unnecessary purchase. Sigh.

Friday, May 6, 2016

Friday Funday

 
 Many times, I have been tempted to wear my most business-like clothes on a Friday, but I usually hold myself back and wear something a little more casual instead. Friday is supposed to be when you dress down, not up!

However, this Friday, I put on my nicest wool pants and blazer, and decked myself out in a suit that wouldn't look out of place in even the stuffiest of offices. OK, I kid myself—in my lavender camisole, purple shoes, and tacky grape-themed jewelry, I am surely pushing the boundaries of business attire, but hey, it's Friday!

There are many reasons I chose to wear a suit on a Friday, among them being: the weather has been atrociously cold and wet for what seems like ever (a day or two ago, I heard on the radio that we were entering our tenth straight day of rain), and I felt like wearing something covered-up and warm. Also, I switched to my summer wardrobe yesterday (for reasons I'll explain in a future post), meaning my selection of warm and covered-up clothing just dwindled to almost nothing. But probably most importantly, I desired an unobtrusive backdrop for the aforementioned grape jewelry I recently acquired.

Let's have a closer look at it, shall we?
 
 
I got it on eBay for just 2.25$ for the set. There are many things I've learned not buy direct from China (dresses, dresses, and more dresses!), but jewelry is usually a safe bet. It is the same stuff you can buy at a chain store (much of the jewelry I've purchased from China has arrived with labels such as Forever 21 and Cato), but it comes at a fraction of the cost. If you're ever looking to expand your collection of costume jewelry without breaking the bank, eBay (with a free shipping filter) is your answer!

Tuesday, May 3, 2016

Unfashionista by the numbers

I am on my last 3-day stretch of compression stockings. What I thought was going to be a week-long minor nuisance ended up being over a month of seriously cramped style (punctuated by periods of freedom that sometimes lasted days). Among the many things I learned about thigh-high compression socks during this time, was that you can really only wear them with loose pants and knee-length or longer skirts. That's a hard pill to swallow when the weather's warming up and all you want to do is parade around in your short dresses!

Since I haven't been able to make full use of my clothing collection for over a month, I consoled myself by taking inventory of my clothing collection, and while I was in counting mode, I decided to take inventory of some other things as well. Read on to find out the vital statistics of my closet and blog!

I have 179 articles of clothing within easy access in my closet. Consider this a very low estimate of my current collection, as this does not include athletic clothing, pajamas, socks, undergarments, and layering pieces such as tanks and leggings, nor does it include seasonal clothing that is currently in storage or clothing in the laundry. The breakdown of this collection is as follows: 45 dresses, 38 tops (sweaters and blouses), 36 T-shirts, 27 skirts, 22 casual pants, and 11 dress pants.

Since I value recycling, my next step was to calculate how many of these 179 pieces were new and how many secondhand. As it turns out, I purchased 21% of my clothing new, received 9% of it new as gifts, and purchased or received the remaining 70% used (some of these still had never been worn when I received them, but I consider them secondhand). Casual pants really skewed the "new" percentages upward, as 11 out of 21 pairs of them were purchased new.

Along a similar vein, since I "recycle" my own clothing a lot, I also set out to determine how much of my clothing I have personally given a second life—that is, altered, repaired, or outright refashioned. In nearly all categories, 26-29% of my collection was modified in one of these ways. Once again, jeans and casual pants were the outliers, with only 23 percent of them being altered. In the end, I calculated that 27.8 percent of my clothing is reworked. 

Now if you've looked at pictures of my closet recently, you'll know that I organize my shoes by color. But which color wins the day? Let's find out. For this count, I included all the shoes out in plain sight as well as all the shoes in boxes within easy reach. I did not include the summer shoes that are stowed away in the back of my closet, nor the snow boots that I've already packed away. Unsurprisingly, black shoes strongly outnumbered those of any other hue, but among the more colorful varieties, aqua had a pretty clear majority. Note to self: stop buying aqua shoes!
  • Black - 16
  • Brown - 7
  • Tan - 4
  • Cream - 4
  • White - 2
  • Black & white - 1 
  • Grey - 1
  • Silver - 2
  • Gold - 2
  • Red - 4
  • Yellow - 1
  • Green - 3
  • Aqua - 5
  • Blue - 4
  • Purple - 4
  • Pink - 3
  • Multicolor - 3
Growing bored of counting my clothes, I decided to start counting blog posts about my clothes. If there's one thing I love as much as fashion, it's words. I know I enjoy a good pun as much as more than the next writer, so I was curious how many times I let my penchant for wordplay play out in my posts.

As it turns out, prior to today, I have written 404 posts. Of these, 23 have a new portmanteau or play on words as the title. That's only 6%, but as dads everywhere know, too many cheesy jokes are just that: too many. However, if you are ready for cheesy pun overload, here's a list of all the posts I found that play with words a little too rough...along with explanations, because it's not a good joke unless you have to explain it!
  1. Poppycock (Interjection containing the sound "peacock" to match the clothing's motif)
  2. Bad Jeans (Bad genes)
  3. Grape Fine (Grape vine)
  4. Cutup Girl (Pinup girl)
  5. Looking Sharp (Pointy shoes = Common phrase)
  6. Bug Spree (Bug spray)
  7. Spring / Roll (Spring season + rolled hems = Common food)
  8. Look o' the Irish (Luck o' the Irish)
  9. Pinka Dots (Pink + Polka dots)
  10. Frog Legs (A food, refers to the frogs on my legs)
  11. Peptomint (Pepto pink + Peppermint)
  12. Pin(k)stripes (Pink + Pinstripes)
  13. CaturDIY (Cat + Saturday + DIY)
  14. All White Already (All right already—common phrase in my youth that seems to have gone out of vogue)
  15. Curls' Night Out (Girls' night out)
  16. Cowboys and Indonesians (Cowboys and Indians)
  17. Knee Length to a grasshopper (Knee-high to a grasshopper—you've heard this one, right?)
  18. Modochrome (Monochrome + mod)
  19. Vest Western (Best Western)
  20. Vestoration (Vest + Restoration)
  21. Curl Talk (Girl talk)
  22. Cat / Suit (Suit + cat shoes = catsuit)
  23. Surf's Pup! (Surf's Up + a dog)
And finally, because one of the easiest ways to play with words is to co-opt an already popular combination of them, I had to include a tally of how many of my posts have a reference to a work of film, literature, and music as the title. The total is 26, which is, again, fewer than I thought, but copyright litigation isn't fun, so again it's probably better that most of my titles are original works. Still, in case you're interested, here are the ones that aren't!
  1. Are you Ready, Boots?  (Song lyric)
  2. Blue Moon (Song title)
  3. Greensleeveless (Modified Song title)
  4. My Future Valentine (Modified Song title)
  5. The First of Autumn (Song title)
  6. He liked it so he put a ring on it! (Modified Song lyric)
  7. The tree was in the wood (Song lyric)
  8. She's a pirate (Modified Song title)
  9. How does your garden grow? (Nursery rhyme verse)
  10. The Hunt for Red (Shortened Book title)
  11. Scarf Face (Modified Movie title)
  12. This is crazy (Song lyric)
  13. HVAC is the cruelest this month (Modified Poem verse) 
  14. OpUnfashionista Style! (Modified Song lyric)
  15. Blue Velvet (Song title)
  16. Shopping Hood: Woman in Tights (Modified Movie title)
  17. Yippee Ki-Yo-Ki-Yay (Song lyric)
  18. Valerie, you're a star (Modified Song title)
  19. Doctor Shoe (Modified TV show title)
  20. Strawberry Fields (Song title)
  21. I just wanna be a sheep (Song title)
  22. Don we now our gay apparel (Song lyric)
  23. They say I'm shoe-nuts (Misremembered song lyric)
  24. No country for old scrunchies (Movie title)
  25. Paint it pink (Modified Song title)
  26. Gold & Curls (Modified TV show title)
And now, I'm finally done—with this post, if not with compression stockings! But in two days, I hope to have full use of my legs and wardrobe again...so if statistics are not your thing, stand by for your familiar flamboyant fashion, coming soon!

Sunday, May 1, 2016

Oversized Patchwork Jacket


A few months ago, I resized this extra-large hoodie to make it into a slimmer fitting, but still long, jacket for biking in. I left you with a complaint about the kerning that I simply had to rectify. It took me several months, but eventually I got around to covering up the offendingly spaced letters.

At first, I attempted to just scrape off the screen print. After ours of relentlessly picking at it (I stretched the fabric over my knee and then scratched with my fingernail, until both my fingers and my legs were sore), I finally had removed all of the lettering. But even after a nice hot bath in the washing machine, you could still see the ghost of Virginia Beach, so I had to think of a way to cover the words up.

I wanted to do a fun graphic, but couldn't think of a representational shape that would look good extended over the two halves of the front, so I decided to go abstract with patchwork instead. Here's how I originally sketched it, with a graduated design that would be fully covered and busy at the top, with fewer and fewer patches as you went down the front.

Then I got to work with actual fabric! I used scraps from previous projects: sleeves from the pink and green plaid shirt, an old off-white T-shirt that I've been cutting apart just for its fabric for years, the pink lining that I used briefly inside my Indonesian Princess dress (after turning it into a skirt, I am refashioning it again, and I hope you'll see the result soon!), bits of another Indonesian dress that I am still struggling with, and a couple of green scraps whose origin I no longer recall. I cut them into variously sized rectangles and then started dropping them onto the hoodie until they were arranged to my liking.

I would eventually sew them all down, but first I had to keep them in place, which I accomplished with a bit of temporary fabric glue.

Once they were all somewhat fixed in position, my next step was to remove the excess that dangled over the edges of the sweatshirt.

Then I had to sew them down permanently. This was a more challenging endeavor than I ever imagined.

I chose a contrasting white thread with brown bobbin thread to match the interior of the jacket. I started at one edge of the design, and began zigzag stitching over the edges of the patches, following a winding path and trying to sew as many edges as I could without overlapping a seam. Pretty soon, however, I was only able to sew an inch in in any given direction before I ran into an already stitched seam. So then I had to pick up my needle, reposition the fabric, and start over again in a new spot. This took forever! 

Of course it got messy. There were plenty of spots where I somehow failed to overlock the seam entirely, and other spots where the fabric frayed out from under my stitches. But lots and lots of repairs later, I was finally finished!

I wanted to follow my original design of placing a few lone patches over the bottom portion of the hoodie, but my original design had neglected to take the pockets into account. There was no way I could machine-stitch over those pockets without stitching them closed, and no way I was going to continue this labor by hand, so the finished product is a little more top-heavy than I intended, but it is nonetheless a finished product, and I consider that a victory!